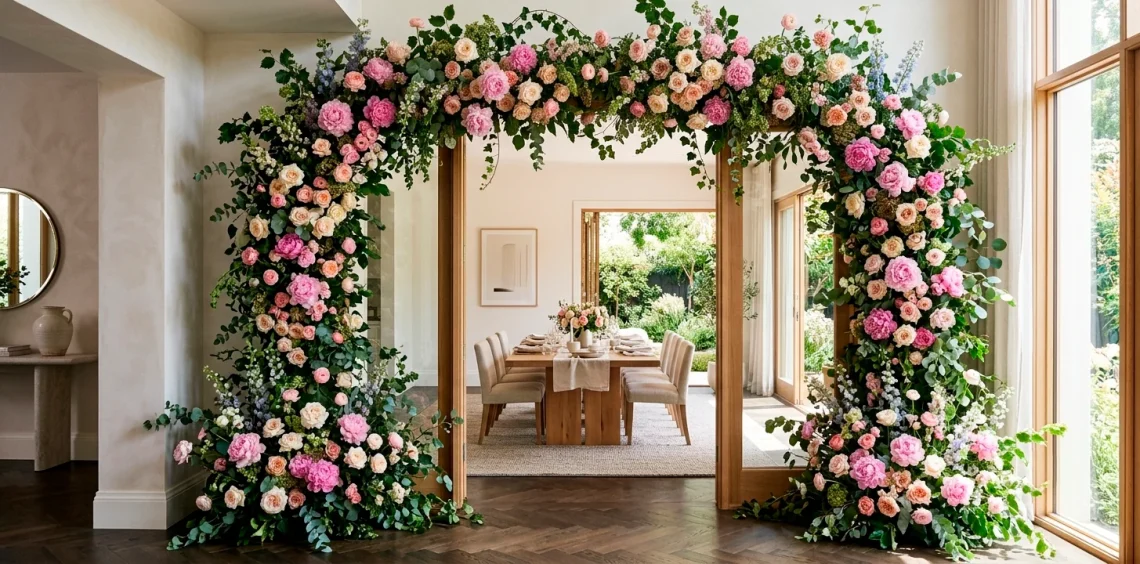
Want to make Mom cry happy tears this year? Skip the generic store-bought bouquet and build a jaw-dropping statement floral installation right in her dining room. I wrecked enough floral foam in my early days to finally master what works and what completely flops. Grab your favorite pruning shears and let us craft a masterpiece she will never forget!
Choosing the Ultimate Display Location
Ever wondered why some floral displays look like museum pieces while others look like a total afterthought? Location dictates absolutely everything. You need an anchor point that naturally draws the eye without disrupting the daily flow of the house.
I always love using a wide entryway console table, a dramatic bare staircase, or even an existing overhead lighting fixture. Pick a spot that offers genuine structural support and gets plenty of natural light. Mom deserves a high-impact reveal when she finally walks downstairs for her Sunday brunch.

Gathering Your Structural Arsenal
You absolutely cannot build a massive floral cloud using just pretty petals and blind hope. A sturdy mechanical foundation keeps the entire design from completely collapsing onto the dining table. I rely heavily on coated chicken wire because it bends easily and protects delicate plant stems. Do not skip the waterproof floral tape, as it secures your mechanics tightly to whatever base you choose. FYI, water tubes save lives when you build directly on staircases. Here is your essential tool kit for the big day.
Essential structure tools:
- Coated green chicken wire
- Heavy-duty waterproof floral tape
- Reusable plastic water tubes
- Sharp floral pruning shears

Selecting the Showstopper Blooms
Now for the absolute best part—picking the flowers! You want a dynamic mix of sizes and shapes to create incredible visual depth.
I usually start by securing the primary focal flowers. Think massive, dinner-plate peonies, lush garden roses, or exotic pink proteas.
Buy more blooms than you think you need. Installations swallow flowers whole, and running out mid-build feels absolutely terrible.
Grab a few unexpected elements like blooming branches or local wildflowers. These wild additions elevate the entire arrangement. For more inspiration on bringing lush elements indoors, check out this guide to lush botanical decor in a modern home.

Prepping and Hydrating Like a Pro
Do you know what looks worse than no flowers? Drooping, sad flowers that give up on life before Mother’s Day brunch even starts. Proper hydration guarantees a vibrant, long-lasting installation. Give every single stem a fresh, sharp diagonal cut the exact second you bring them inside your house.
Strip away any foliage that falls below the waterline to prevent nasty bacterial growth in your buckets. I always let my stems drink deeply in cool water in a dark room overnight before I even attempt to build the piece. This crucial step forces the tight buds to open beautifully.

Building the Lush Green Base Layer
Every truly great floral installation requires a solid, leafy foundation to hide the messy mechanics and establish the overall shape. Foliage acts as the essential roadmap for your entire design.
I always start by threading long, dramatic branches of silver dollar eucalyptus or trailing smilax directly through my chicken wire base. You want to establish the outer boundaries and maximum reach of your shape right away.
Do not make it perfectly symmetrical! Nature grows wildly in every direction, so your greenery should mirror that beautiful, slightly chaotic organic movement.

Placing the Hero Flowers Strategically
Once your green skeleton looks thick and lush, you can finally introduce the heavy hitters. You must insert your largest, most expensive flowers first so they command the most visual attention. I cluster three huge garden roses together near the center to create a powerful focal point. Vary the depth of your placements by pushing some blooms deep into the foliage and leaving others hovering playfully on the surface. This clever technique prevents the installation from looking like a flat, boring wall of petals and gives it that professional, high-end gallery aesthetic.

Adding Texture and Whimsy
This specific stage completely transforms a nice arrangement into a spectacular, unforgettable work of art. Interesting texture brings the whole scene to vibrant life.
I carefully weave delicate, dancing flowers like butterfly ranunculus, sweet peas, or tall scabiosa throughout the heavier, denser blooms.
Always let these delicate stems extend furthest from the central base. They should look as though they are actively growing out of the main installation.
These little whimsical touches catch the morning light beautifully and add a genuine sense of magic. I promise Mom will absolutely obsess over these tiny, delicate details. 🌸

Concealing the Mechanics
Step back from your masterpiece and ruthlessly inspect the entire piece from every possible angle in the room. Can you see a sudden glint of chicken wire, a rogue piece of green tape, or the plastic rim of a water tube peeking out?
Cover those exposed mechanics immediately. I always use short, fluffy pieces of leftover greenery, moss, or broad galax leaves to plug any visible holes in the structure. A truly professional installation maintains its magical illusion perfectly, completely hiding all the heavy engineering from your impressed guests.

Mist and Maintain for the Big Day
You finished the hard labor, but the job continues until Mom actually sees the masterpiece. Central heating and air conditioning dry out fresh flowers ridiculously fast. Mist the entire installation generously with fresh water every few hours leading up to the reveal. IMO, a good floral finishing spray works wonders to lock in moisture and keep those delicate petals looking incredibly crisp. Keep the room as cool as comfortably possible overnight. You want those beautiful blooms looking absolutely flawless when she walks into the room tomorrow morning.

The Unforgettable Reveal
The moment of truth finally arrives! Seeing Mom’s reaction to a massive, custom-built floral cloud hanging in her home makes all the scratched hands and messy floors totally worth the effort. 😭
Nothing says “I love you” quite like dedicating hours to building something beautiful just for her. Capture plenty of bright photos of her standing next to the completed installation.
Once the flowers eventually fade, you can actually preserve the best petals! Turn them into a lasting keepsake with this fun guide on crafting botanical Mother’s Day pressed flower frames.

Conclusion
Wrapping up a massive floral installation feels incredibly rewarding, especially when it honors someone as special as Mom. You learned how to build a sturdy base, place stunning blooms strategically, and hide the messy mechanics like a total pro. Now it is your turn to create some serious floral magic in your home. Which focal flower are you grabbing first? Let me know in the comments!