Your fireplace mantel sits there all year just begging for a festive makeover. I completely botched my first attempt years ago, creating a cluttered mess that resembled a haunted garage sale! Ever wondered why some mantels look effortlessly chic while others scream chaos? I will walk you through a foolproof process to design a show-stopping display. Grab your favorite pumpkin spice latte, and let’s turn that boring shelf into a spooky masterpiece! 🦇
Pick Your Poison: Choosing a Theme
First things first, you need a solid game plan. Throwing random plastic skeletons at a wall never works out well, IMO. Decide if you want a classy gothic vibe, a family-friendly pumpkin patch, or a terrifying haunted house aesthetic. Nailing down a specific theme keeps your design focused and stylish.
I usually lean towards the witchy aesthetic because it blends seamlessly with my everyday decor. Plus, it gives you a great excuse to buy cool apothecary jars! Need some inspiration for tight quarters? Check out these witchy Halloween aesthetic small spaces pro tips.

Clear the Clutter and Create a Blank Canvas
Remove absolutely everything from your mantel before you start decorating. Yes, even that framed photo of your dog. Starting with a completely bare surface prevents visual overcrowding. Wipe down the wood or stone to give yourself a clean slate. Trust me, dust bunnies do not count as authentic Halloween cobwebs! Once you clear the space, you accurately gauge your available room for the big, dramatic focal points you plan to add next.

Establish a Spooky Focal Point
Every great mantel needs a massive anchor piece right in the middle.
Think about hanging an oversized vintage mirror, an eerie piece of canvas art, or a massive twisted branch wreath. Your focal point instantly draws the eye and sets the scale.
Have you ever noticed how tiny decorations look completely lost on a big wall? A large central item solves that problem immediately.
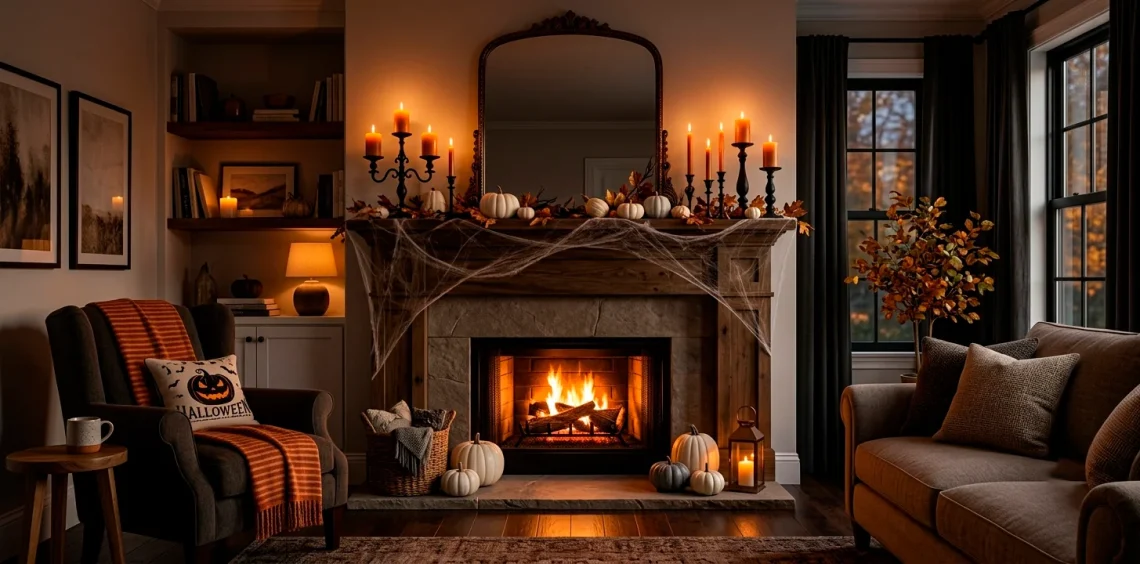
I personally love using an antique arched mirror draped with creepy cloth. It reflects the flickering candlelight beautifully once the sun goes down!

Build Your Creepy Base Layer
Now that your anchor sits perfectly in place, you must lay down a foundation along the actual shelf. Faux spider webs, tattered cheesecloth, or a lush garland of dead black leaves work wonders here. Let the material droop slightly over the edge to soften the harsh lines of the architecture.
Base layer elements:
- Tattered black creepy cloth
- Dark faux autumn leaf garland
- Stretchable synthetic spider webs
Always layer your fabrics loosely to create natural shadows and depth.

Add Height with Candles and Candlesticks
Flat mantels look incredibly boring. You absolutely must inject some varied height into your display!
Tall, slender candlesticks flank your focal point perfectly and bring much-needed symmetry. Mix and match different metal finishes, like tarnished brass or matte black iron, for a collected-over-time look. Battery-operated LED taper candles offer the safest way to get that moody glow without burning your house down.
I learned the hard way that real wax drips ruin expensive woodwork. Save yourself the headache and go artificial.

Introduce Textures and Shapes
Scatter secondary items across your base layer to bridge the gap between your tall candles and your flat fabrics. Nestle varied sizes of pumpkins, faux skulls, or vintage books throughout the arrangement. Varying your textures keeps the eye moving and prevents the design from feeling flat. Pair a smooth ceramic skull right next to a bumpy, wart-covered gourd. This contrast adds serious visual interest. If you want to carry this vibe into other seasons, explore these modern organic fall decor ideas for year-round texture inspiration.

Inject Pops of Unexpected Color
Orange and black clearly dominate this holiday, but sticking strictly to that palette gets old fast.
Toss in some deep burgundy faux florals, metallic gold accents, or even some weirdly cool toxic green moss. A surprise splash of color elevates the entire setup from basic to bespoke. You don’t need a rainbow, just one or two accent shades to break up the monotony.
Seriously, deep plum and brass look insanely sophisticated together. Try it out and thank me later! 🖤 It gives off major haunted mansion energy.

Incorporate Personal and Quirky Details
Give your display a little soul by adding items that mean something to you. Prop up a spooky silhouette portrait of your cat or display an old, strange antique you found at a flea market. This is where you inject your unique personality into the mix. I actually framed an old Victorian skeleton key that I dug up in my backyard!
FYI, nobody wants a living room that looks like a generic big-box store catalog. Quirky, one-of-a-kind oddities make your mantel truly unforgettable and spark fun conversations with guests.

Master the Art of Lighting
Proper lighting absolutely makes or breaks a spooky atmosphere.
Beyond your LED taper candles, weave some warm micro fairy lights through your creepy cloth base. These tiny bulbs illuminate the dark corners and cast eerie shadows up your walls. They instantly bring the whole arrangement to life after dark.
Have you tried hiding small battery-operated uplights behind your central mirror or art piece?
It creates a haunting halo effect that looks incredibly professional. Just conceal the battery packs behind a strategically placed pumpkin!

Step Back and Edit
Your final step requires a brutal, critical eye. Walk to the other side of the room, grab a drink, and scrutinize your handiwork. Does one side look noticeably heavier than the other? Move things around until the visual weight feels balanced. Editing separates amateur decorators from the pros. Sometimes, taking away one or two small items actually makes the remaining pieces stand out so much more. Don’t fear the empty space; embrace it to let your star decorations breathe!

Conclusion
Creating the perfect spooky setup doesn’t require a design degree, just a little strategy and a lot of imagination. You now have the exact blueprint to build a hauntingly beautiful focal point that your friends will envy. So, which theme are you grabbing first from your decoration stash? Let me know in the comments! Happy decorating, and stay spooky! 👻