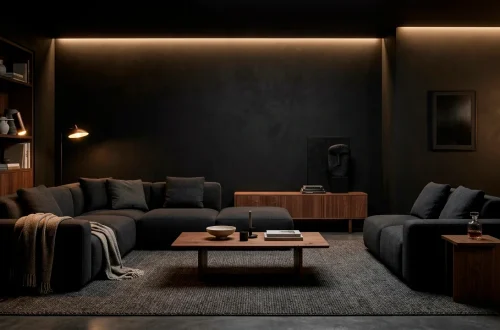
Let’s face it: those flat, featureless closet doors are doing absolutely nothing for your bedroom’s vibe. They’re the “beige walls” of furniture—functional, sure, but visually depressing. I used to stare at mine and sigh until I found removable molding kits. Finally, we can get that custom, high-end millwork look without losing our security deposit or accidentally sawing off a finger. Ready for a serious glow-up?
The Renter’s Ultimate Loophole
Ever wondered why some apartments look like a million bucks while yours looks like a cardboard box? It’s the architectural detail, my friend. Removable molding kits use lightweight materials and command-strip-style adhesives to mimic permanent trim. I honestly thought it would look cheap, but the results totally shocked me. It’s the ultimate loophole for anyone who wants a custom home but doesn’t actually own the walls.
Seriously, why settle for boring when you can have “Parisian apartment” vibes? These kits arrive pre-cut, so you don’t even have to look at a miter saw. It’s the easiest way to add character without a construction crew.

Choosing Your Design Vibe
You need to decide on a vibe before you start sticking things to your doors. Do you want classic Picture Frame Molding for a traditional feel, or maybe something more Modern Shaker style? IMO, the double-frame look adds the most depth. It makes the door feel heavy and substantial, even if it’s just hollow-core junk. Honestly, browsing Pinterest for five minutes will give you too many ideas, but just pick one and commit!
Design styles to consider:
- Classic Victorian double-box panels
- Minimalist Shaker borders for a clean look
- Glamorous metallic-painted trim accents

Prep Work or Bust
Don’t you dare skip the cleaning step. If your doors have layers of dust or oils from your hands, the adhesive will fail faster than my last diet.
I learned this the hard way when a piece of trim fell off in the middle of the night and scared me half to death. I woke up thinking a ghost was redecorating.
Give the surface a quick wipe with rubbing alcohol. It takes two minutes and ensures the bond stays strong for years.
Is it boring? Yes. Is it necessary? Absolutely. You want your molding to stick, not slide off during a humid afternoon.

Measuring Twice, Crying Zero Times
Precision is your best friend here. Grab a level and a pencil because “eyeballing it” is a recipe for a crooked mess. I recommend using a spacer block to keep your distances consistent between the edge of the door and the molding.
Why work harder when you can work smarter? Using a spacer ensures every panel looks identical without you having to do math every five seconds. Consistency is what separates a DIY fail from a professional finish. For more organization tips, check out this moody forest green mudroom guide.

The Peel and Stick Installation
Most kits come with pressure-sensitive adhesive already applied to the back. You literally peel the liner and press the molding onto your pencil marks. Hold each piece for 30 seconds to ensure a solid bond. It’s basically a giant sticker for adults who love interior design. FYI, once it’s on, it stays on, so make sure your alignment is perfect before you commit! If you mess up, you might need a putty knife to pry it off, and nobody wants that hassle.

Painting for a Permanent Look
Here is the secret sauce: paint the molding the same color as the door. This is what makes it look like expensive, built-in millwork instead of a plastic add-on. I usually use a small foam roller for a smooth finish without those pesky brush strokes.
If you leave the molding stark white against a cream door, it’ll look like an afterthought. We want “architectural genius,” not “weekend craft project.”
Don’t be afraid to go bold with color either! A dark navy or deep green can turn a boring closet into a focal point of the entire room.

The Hardware Upgrade Finishing Touch
If you’re doing the work to add molding, please don’t leave those 90s plastic knobs in place. Adding oversized brass pulls or sleek matte black handles completes the transformation. It’s like putting on jewelry after getting dressed.
Knob styles that pop:
- Long vertical T-bars for a modern edge
- Vintage-inspired unlacquered brass knobs
- Modern acrylic and gold pulls for a glam vibe

Mastering the Bifold Door
Bifold doors are notoriously annoying, right? They never want to stay on track and they look like they belong in a cheap motel. But you can fix them!
The key is ensuring your molding doesn’t cross the center hinge line.
Leave at least a quarter-inch of clearance so the doors can still fold flat. If you ignore this, you’ll hear a nasty crunching sound the first time you try to get a shirt out. Trust me, that’s a sound you don’t want to hear.
It’s a simple fix that keeps the doors functional while looking absolutely fabulous.

The Painless Removal Process
Eventually, you might move or change your mind. To remove these without damage, use a hairdryer to soften the adhesive before gently prying them off. It’s like magic. For more bedroom luxury ideas, you might like this modern luxury bedroom finishes guide.
Doesn’t it feel good knowing you haven’t ruined your landlord’s property? You get to keep your deposit and your dignity. Just wipe away any leftover residue with some Goo Gone and it’s like you were never there.

Cost vs. Visual Impact
Let’s talk money. A full kit for two doors usually costs less than a fancy dinner out. Compare that to the price of custom-ordered wood doors, which can run into the thousands. It’s a no-brainer for anyone on a budget.
The ROI on your happiness every time you walk into the room is basically infinite. Who knew a few strips of plastic could change your life? It’s the ultimate high-impact, low-effort project.
You’ll spend more time picking the paint color than you will actually installing the kit!

Final Thoughts on Your Door Glow-Up
You really don’t need a massive budget or a woodshop to fix those tragic closet doors. Removable molding kits give you the freedom to experiment and the satisfaction of a high-end “after” photo. So, are you going for the classic Parisian look or a modern Shaker vibe first? Drop a comment and let me know in the comments—I’m dying to hear how your closet transformation goes!