Skip to content
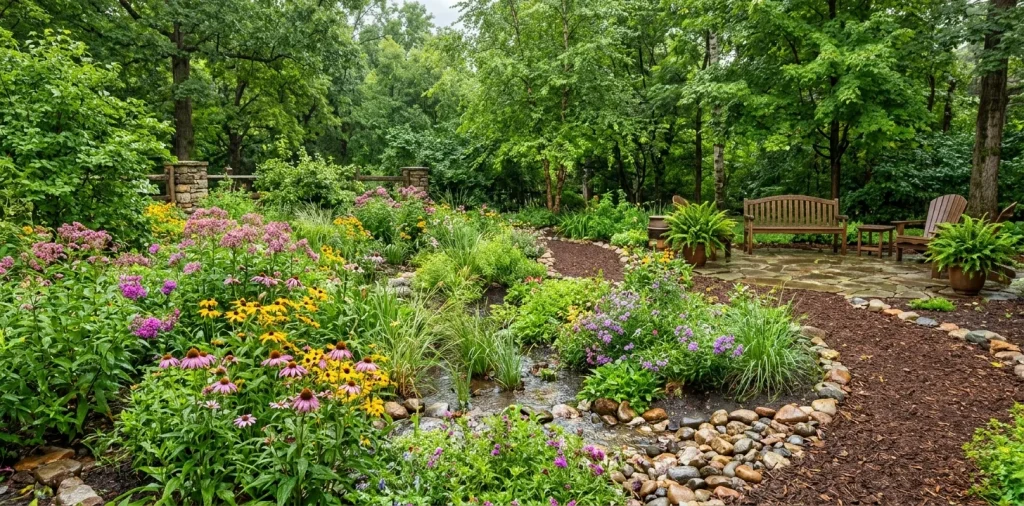
So, every time it rains, your backyard turns into a muddy swamp? I completely feel your pain. Nobody wants a moat unless they actually live in a medieval castle. Let me show you a genius hack: rain gardens. These beauties soak up excess stormwater while looking absolutely stunning. We can fix that soggy lawn issue and support local wildlife all at once. Ready?
What the Heck Is a Rain Garden Anyway?
A rain garden operates as a shallow, purposely built depression in your yard that catches runoff from your roof, driveway, or patio. You simply let nature do the heavy lifting here. 🌿
Instead of watching precious topsoil wash down the street, you trap that water. Native plants then drink it up and filter out pollutants. I built my first one near a stubborn gutter spout, and FYI, it completely solved my basement flooding scare. Plus, you get a mini nature reserve right outside your window.

Why You Need One Right Now
Traditional lawns act surprisingly like concrete when it downpours. They just don’t absorb water fast enough to keep up with heavy storms.
The water sheets right off the grass, picking up lawn chemicals, pet waste, and motor oil before dumping it all into our local storm drains. Yuck. 🤢
A useful little gift for your home
🎁 Free Plant Finder Tool
Filter 250+ houseplants by 6 smart criteria to find your perfect green companion.
We’ll email you the link. Plus, you’ll join our newsletter!
Rain gardens fix this toxic mess beautifully. They absorb 30% more water than a standard patch of grass, acting like a massive, beautiful sponge.
Besides protecting the local rivers, they bring incredible life back to your property. Butterflies, hummingbirds, and beneficial bees will swarm your new oasis. It totally elevates your outdoor game and turns a drainage nightmare into a massive landscaping win.

Finding the Perfect Puddle Zone
Location matters immensely when planning your layout. You want to place your garden at least ten feet away from your home’s foundation. Pushing gallons of water directly into your basement defeats the entire purpose, obviously! 🤦♂️ You must observe your yard during a heavy downpour and notice exactly where the water naturally flows and pools. Never build over a septic tank or buried utility lines. Call your local dig-safe hotline before you even touch a shovel. You also need decent sunlight, as most native bloomers crave at least partial sun to produce those gorgeous flowers we all want.

Testing and Prepping the Soil
You cannot just dig a hole and walk away. Rain gardens need soil that drains well, so you must perform a quick percolation test first.
Dig a hole, fill it with water, and time how fast it disappears. If it drains slower than an inch per hour, you probably have heavy clay. Don’t panic! You simply need to mix in some compost and coarse sand to loosen things up significantly.
Creating a spongy soil mix ensures the roots breathe and the water actually vanishes within a day. Standing water breeds mosquitoes, and nobody wants to host a bug party in their backyard.

Selecting Native Plants That Actually Survive
Here comes the fun part. You must choose native plants because they already know how to survive your specific local climate. They handle massive rain dumps and then confidently survive the dry spells that follow. Exotic plants just wilt and complain.
I highly recommend checking your local agricultural extension for a region-specific list. You want deep-rooted perennials that thrive on neglect. Their massive root systems break up the soil over time, making the drainage even better every single year. It feels like magic, honestly!

Grouping Plants by Moisture Needs
You need to divide your chosen plants into three distinct moisture zones. The deepest part requires serious wet feet champions.
Best planting zones:
- Center basin: Swamp Milkweed, Sedges
- Sloping sides: Black-Eyed Susans, Joe-Pye Weed
- Outer edges: Native grasses, Yarrow
The sloping sides prefer adaptable guys that can handle occasional flooding but dry out quickly.
Finally, the outer edges rarely sit in water, so they need drought-tolerant superstars to frame the whole bed nicely. Putting a dry-loving plant in the center puddle basically guarantees a soggy demise.

Designing for Maximum Curb Appeal
Let’s ensure this functional drainage ditch actually looks like a million bucks. A random scattering of plants looks extremely messy, so I always group identical species in clusters of three or five. This creates bold sweeps of color that catch the eye instantly. You should also incorporate some hardscaping elements. Strategic placement of river rocks or a dry creek bed leading into the garden adds incredible visual interest even during the winter months. IMO, adding a few larger boulders anchors the whole design beautifully. If you want to tie this natural look to your nearby patio, check out these 15 industrial style backyard kitchen ideas exposed brick.

Digging In and Getting Dirty
Grab your favorite shovel and stretch your back. You usually need to dig down about six to eight inches for a standard residential yard.
Keep the bottom of your basin completely flat. A flat bottom spreads the water evenly so every plant gets an equal drink. Use the excavated soil to build a sturdy berm on the downhill side.
This small wall keeps the water trapped inside the garden where it belongs. Compact that berm tightly! Once you place the plants, spread a two-inch layer of shredded hardwood mulch to suppress weeds and retain moisture.

The Not-So-Scary Maintenance Routine
People often think native gardens run completely wild, but you still have to do some minor upkeep. For the first year, you must water your new plants during dry spells so their roots establish deeply. Pull out sneaky weeds before they steal the spotlight.
Once established, this system basically runs on autopilot. You only need to trim back dead stems in late spring. Leaving the dead growth over winter provides essential shelter for native bees and birds. It feels great to save the planet while barely lifting a finger!

Troubleshooting Common Issues
Sometimes things don’t go perfectly on the first try, and that is totally okay.
If water still pools after 48 hours, your soil mix probably needs more sand and compost. You might have to dig up a section and amend it further. Don’t stress too much about it.
If weeds aggressively take over, you likely need a thicker layer of mulch. A solid three inches usually blocks out the most stubborn invaders.
Keep observing and tweaking. Gardening requires patience, but the beautiful, eco-friendly payoff totally justifies the effort. For more outdoor inspiration, maybe look into mastering dark bottom koi pond moody deep water.

A useful little gift for your home
🎁 Free Plant Finder Tool
Filter 250+ houseplants by 6 smart criteria to find your perfect green companion.
We’ll email you the link. Plus, you’ll join our newsletter!
Conclusion
Managing storm runoff doesn’t have to mean ugly plastic pipes and soggy lawns. By installing a rain garden, you actively harness nature’s own filtration system and create a stunning focal point. You get beautiful blooms, happier local wildlife, and a blissfully dry basement. What native flower are you putting in the center of your new oasis? Let me know in the comments!