Skip to content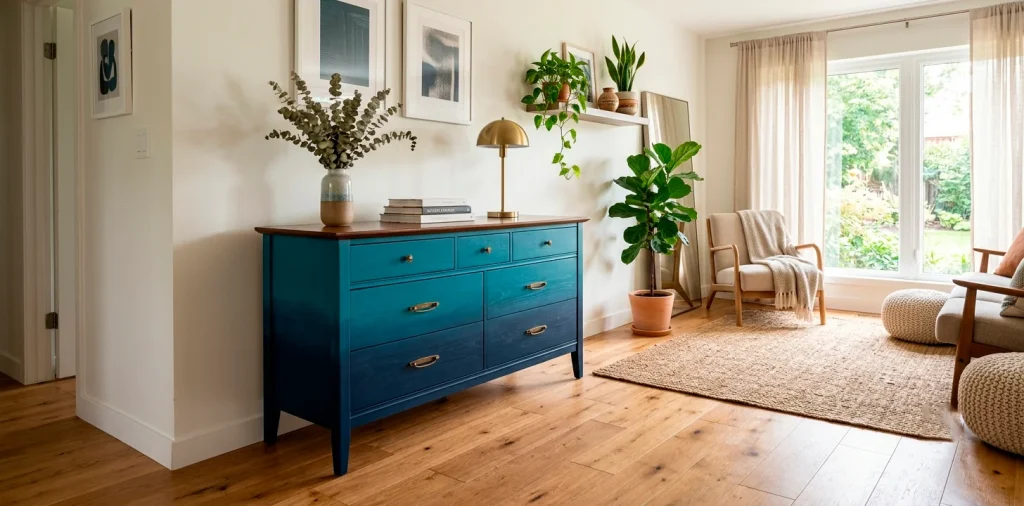
You just stared at that boring old dresser in your bedroom and realized it looks like a sad potato, didn’t you? We have all been there. Transforming tired furniture into a stunning, color-blended showpiece is easier than you think. You can master the gradient trend this weekend with a few brushes and zero stress. Let’s make some DIY magic happen!
Why Ombre? (The Magic of the Fade)
Why are we all so obsessed with gradient colors lately? Simply put, an ombre finish adds instant drama and depth to any boring room. It pulls the eye upward and turns a basic, uninspired storage unit into a bespoke piece of art. IMO, it is the absolute coolest way to inject bold personality into your living space without overwhelming the entire house.
You also get to hide everyday imperfections like a total pro. Darker colors at the bottom ground the piece and effortlessly cover up old scuffs, while lighter tops keep the vibe airy and fresh. Ever wondered why high-end designers charge thousands for this look? Now you can hack the design system for the cost of a few paint cans!

Picking Your Piece: What Furniture Works Best?
Not all furniture is created equal when it comes to pulling off a seamless gradient. You want a piece with clean, flat surfaces and multiple drawers or doors to help visually guide your color transitions. A tall mid-century modern dresser, a classic wooden filing cabinet, or even a simple bedside table work wonders for beginners. Avoid pieces with crazy ornate carvings or deep grooves for your very first project, unless you genuinely enjoy scrubbing wet paint out of tiny crevices with a toothbrush at 2 AM! Pick something with good bones that just needs a little surface love, and you are already halfway to finishing your custom showpiece.
A useful little gift for your home
🎁 Free Plant Finder Tool
Filter 250+ houseplants by style, size, and care level to find your perfect green companion in seconds.
We’ll email you the link. Plus, you’ll join our newsletter for fresh home inspiration.

Color Theory 101: Choosing Your Palette Without Crying
Let’s talk colors! Picking your gradient palette can feel intimidating, but you only need two or three shades in the same color family to create magic.
Think navy melting into sky blue, or deep forest green fading into soft sage.
Want to get crazy? Try a sunset fade using terracotta and blush pink. Just make sure your colors blend nicely on a paper plate before you slap them onto your favorite wooden nightstand!
Always buy paint from the same brand and product line so the chemical formulas mix smoothly without clumping. You can learn more about combining hues in our guide to olive green paint colors.

Prep Work: The Boring Part That Actually Matters
I know, I know. You want to skip straight to the fun painting part. But trust me, skipping your prep work guarantees a peeling, flaky disaster down the road. First, remove all hardware and give the entire wood surface a thorough cleaning with a degreaser to strip away years of built-up grime and hand oils. Next, grab a medium-grit sanding block and scuff up the surface just enough to give your new paint something to grip onto. You do not need to sand it down to bare wood unless the old finish is chipping off in chunks. Wipe away every speck of dust with a damp microfiber cloth or tack cloth, and apply a high-quality primer if you are painting over dark laminate or glossy stain.

The Secret Weapon: Supplies You’ll Need
You cannot paint a masterpiece with an old, crusty brush you found at the bottom of your garage toolbox. Quality tools make blending infinitely easier!
Must-have supplies for gradient blending:
- Two or three synthetic bristle brushes: Use a dedicated brush for each distinct color shade.
- One continuous-mist water spray bottle: This keeps the paint wet and movable while you blend the transition zones.
- A high-density foam roller: Great for quickly applying your smooth base coat.
- Lint-free rags: Essential for wiping excess paint off your blending brushes.
That continuous mist bottle is your absolute best friend here. It creates an ultra-fine cloud of moisture that stops water-based paint from drying before you finish creating your dreamy fade.

Step 1: Laying Down the Base Coat
Now for the fun part! Start by painting the lightest shade of your ombre palette over the entire piece of furniture, or at least over the top half where your lightest color will live. Using a light base coat makes all your subsequent color layers pop with incredible vibrancy. Don’t worry if this first layer looks a bit streaky or uneven; it is simply acting as the foundation for your gradient magic.
Let this initial coat dry completely according to the instructions on your paint can. Usually, an hour or two is plenty for modern chalk or mineral paints. Run your hand lightly over the dried surface—if it feels rough, give it a super gentle buff with fine 400-grit sandpaper before moving on!

Step 2: Blending Like a Pro (The Wet-on-Wet Technique)
Here is where the true artistry happens! Working quickly, apply your darkest color to the bottom section and your middle shade right above it, ensuring the wet edges touch.
Now grab your continuous-mist spray bottle and give the horizontal border between two colors a light, even spritz of water.
Take a clean, dry brush and hold it at a 45-degree angle. Use light, crisscross X-motions to feather the two wet colors together across the transition line. Wipe your brush on a rag frequently so you don’t drag dark paint too far into the light zone!
Step back every few minutes to check your work from a distance. Your eyes will instantly spot any harsh lines that need a little extra misting and blending. 😉

Step 3: Fixing Mistakes (Because You Will Make Them)
Did your gradient turn out looking more like a striped zebra than a smooth sunset? Take a deep breath and put down the paintbrush! The beauty of paint is that nothing is permanent. If a transition area looks muddy or uneven, simply let the entire section dry completely. Once dry, lightly mist the problem area with water, apply a tiny dab of your two overlapping colors right next to each other, and gently blend them again with a clean brush. You can layer and re-blend as many times as you need until you achieve gradient perfection. Honestly, my very first ombre nightstand took me three tries before I stopped panicking!

Sealing the Deal: Protecting Your Masterpiece
You just spent hours crafting the most gorgeous gradient fade known to humankind. Do not ruin it by skipping the topcoat!
Why sealing is non-negotiable:
- Protects against daily wear: Prevents chips, scratches, and coffee ring stains.
- Unifies the sheen: Evens out any dull or shiny patches left behind by the water-blending process.
- Enhances color depth: Makes your faded hues look richer and more professional.
Apply two thin coats of a water-based clear polyacrylic using a soft synthetic brush or a high-density sponge. Avoid oil-based polyurethane, as it will turn your crisp light colors yellow over time! For more ideas on protective finishes and raw styling, check out our industrial chic studio ideas.

Styling Your New Statement Piece
Now that your ombre masterpiece is dry, cured, and looking fabulous, it is time to integrate it into your room decor. Since your furniture is now the undisputed star of the show, keep the surrounding accessories relatively restrained and simple.
Pair your dramatic gradient furniture with neutral walls, natural woven textures, and sleek metallic hardware like brushed brass or matte black knobs. A cascading greenery plant placed on top draws the eye down through your color transition, creating a cohesive, professionally styled look. Ready to show off your custom creation to all your jealous friends? FYI, you totally earned bragging rights!

A useful little gift for your home
🎁 Free Plant Finder Tool
Filter 250+ houseplants by style, size, and care level to find your perfect green companion in seconds.
We’ll email you the link. Plus, you’ll join our newsletter for fresh home inspiration.
Conclusion
Creating a custom ombre furniture finish is the ultimate way to turn forgotten thrift store finds into breathtaking statement decor. With a little patience, a spray bottle, and some bold color choices, you can conquer the gradient trend like a seasoned pro. What color palette are you grabbing first for your next project? Let me know in the comments!