Have you ever spent an hour perfecting your makeup, only to step outside and realize you look entirely different? Yeah, me too. The culprit is almost always terrible lighting. I’m here to fix that tragic reality! Let’s find out how to upgrade your space so you always step out looking absolutely flawless and ready to conquer the day.
Why Good Lighting is Non-Negotiable
I used to get dressed in a dimly lit closet, blindly hoping my navy sweater wasn’t actually black. What a disaster! Lighting directly impacts how you perceive colors, fit, and texture. Perfect illumination prevents those awkward mismatched outfit days.
If your room relies heavily on a single tragic ceiling bulb, you are doing yourself a massive disservice. Let’s fix that shadow-casting nightmare once and for all, shall we? Good lighting literally changes everything about your morning vibe.
The Truth About Color Temperature
Let’s talk about Kelvin, and no, he’s not my ex-boyfriend. Color temperature dictates the mood and functionality of your dressing area. You ideally want daylight bulbs around 4000K to 5000K for the most accurate reflection. Anything lower looks way too yellow, and anything higher makes you look like you are starring in a bleak sci-fi hospital drama. Stick to the natural daylight spectrum, and you will accurately see how you look to the rest of the world! Trust me, your makeup application will improve tenfold.

Decoding Lumens vs. Watts
Ever stood in an aisle staring blankly at a box of light bulbs? Same.
People often confuse watts with brightness, but that metric just measures energy usage. You actually need to look at the lumens!
Lumen breakdown for your space:
- 500 lumens: Perfect for soft, ambient background glow.
- 1,000 lumens: The bare minimum for a decent makeup check.
- 1,500+ lumens: The holy grail for pristine, high-definition visibility.
Honestly, LED technology saves the day here. You get massive lumen output without melting your face off with unnecessary heat. It is a total win-win for your room and your electric bill!

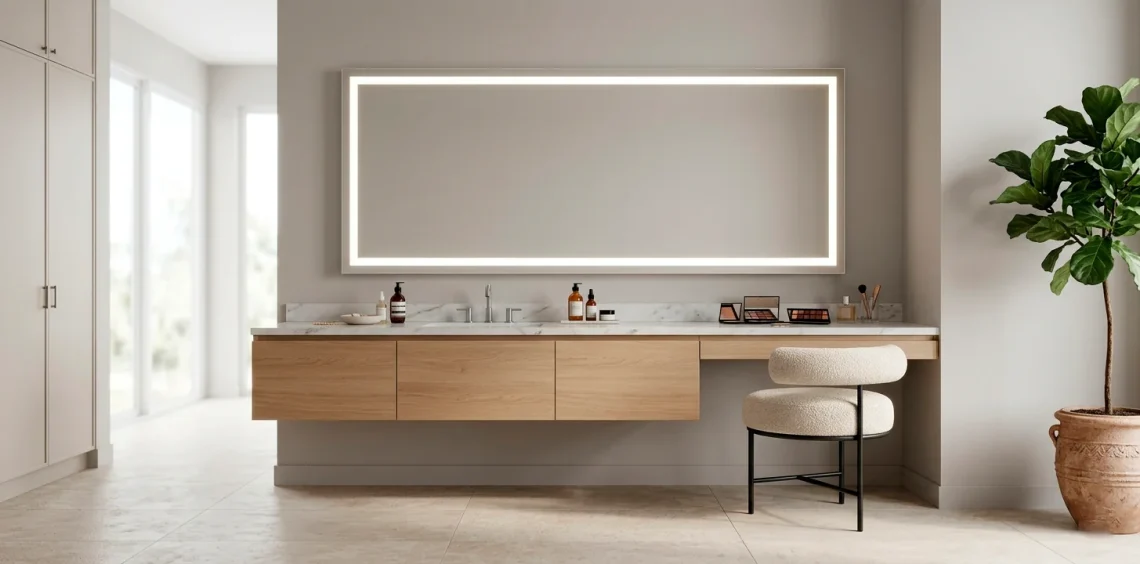
Front-Lit vs. Backlit Mirrors
Choosing between these two styles usually trips people up the most. Front-lit mirrors throw light directly onto your face, making them the absolute best choice for detailed makeup application. Backlit mirrors, on the other hand, create this gorgeous, moody halo effect on the wall behind the glass. IMO, backlit options look incredibly luxurious but offer zero help when you need to pluck a stray eyebrow hair. Prioritize function first, and snag a front-lit model if you need precise visibility for your daily routine.

Placement is Everything
You can buy the most expensive vanity setup on the planet, but terrible placement ruins the entire investment.
Never place your primary light source directly above your head! Doing so creates horrendous under-eye shadows that make you look utterly exhausted.
Install light bars or sconces at eye level on either side of the mirror. This technique washes your face in even, flattering light that mimics professional studio setups. Ready to maximize your whole space? Check out this guide to designing a walk-in dressing room closet.

Smart Lighting Features to Consider
We live in the future, folks. Why settle for a basic on-off switch when you can control your vanity with your voice? Smart mirrors now feature built-in dimmers, anti-fog tech, and adjustable color temperatures.
I absolutely adore having a dimmer switch for early mornings. Nobody wants a 5000K blast of blinding light at 6 AM! Invest in dimmable features, and your retinas will thank you later. Plus, shifting to a warmer glow at night really helps you wind down before bed.

Ditch the Overhead Shadows
I cannot stress this enough: overhead lighting is the ultimate enemy of a good outfit check.
It literally highlights every flaw, casts aggressive shadows under your chin, and hides your best features in darkness.
If you currently use a standard ceiling fixture, try supplementing it immediately with dedicated task lighting around your reflection.
You need multi-directional lighting to truly eliminate those harsh silhouettes and get a crystal-clear view. Add a floor lamp or some wall sconces to balance out the room and save your daily wardrobe checks!

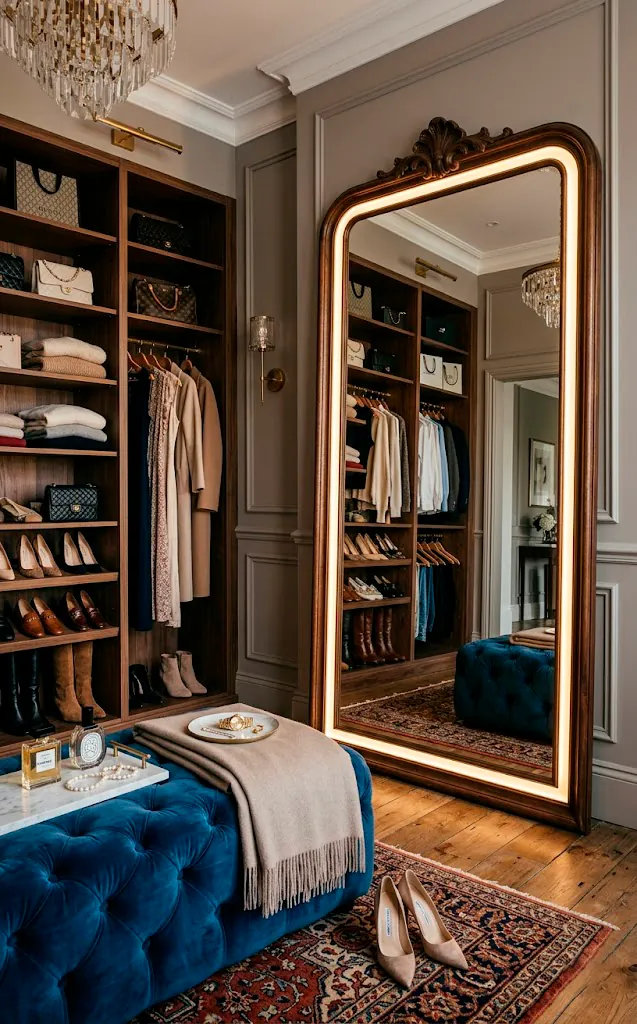
The Magic of Hollywood Bulbs
Do you want to feel like a movie star getting ready for the red carpet? Grab a classic Hollywood-style mirror! Those iconic exposed bulbs surround the glass to provide incredible, even illumination from every single angle. Sure, they lean a bit retro, but they pack a massive punch of functionality. Just ensure you use frosted LED bulbs instead of clear ones to avoid harsh glare. You will instantly upgrade your morning routine with some serious glam vibes ✨. Plus, they look absolutely fantastic as a statement piece!

Battery-Powered vs. Hardwired Options
Renters, listen up! You do not need to tear into your drywall to achieve incredible illumination in your space.
Battery-powered and plug-in LED strips offer fantastic, renter-friendly alternatives that you can install in literally five minutes. I slapped a plug-in light bar onto my old apartment mirror, and it completely changed my life.
Homeowners, though, should definitely spring for hardwired fixtures. A seamlessly installed, hardwired backlit mirror adds tremendous value and a clean, high-end aesthetic to your space. It looks custom and hides all those annoying cords perfectly.

Wrapping Up Your Lighting Glow-Up
Upgrading your mirror lighting might seem like a minor detail, but it entirely transforms your daily routine. You gain immense confidence when you clearly see what you are putting together!
Stop settling for bad shadows and weird color casts. Evaluate your current setup, pick the right color temperature, and position those fixtures perfectly at eye level. Your fabulous wardrobe deserves to be seen in the best light possible!

Conclusion
Lighting truly makes or breaks your dressing room experience. By ditching overhead shadows, picking the right Kelvin temperature, and placing your fixtures at eye level, you guarantee a flawless reflection every single time. Take a look at your current setup today and make those easy swaps. Which lighting style are you grabbing first? Let me know in the comments below!