I absolutely love a gorgeous festive tablescape, but finding the exact shade of green linens feels basically impossible. Why settle for store-bought compromises when you can make your own? Block printing transforms plain fabric into stunning, custom-designed art that brings genuine holiday cheer. Grab an apron, because we are getting our hands dirty today!
Why Green Linens Change the Holiday Game
Let me tell you a secret: deep emerald and moss green linens instantly elevate any festive dinner party. They bring an earthy warmth that standard red or bright white simply cannot match. You get a natural, grounding vibe that makes your gold flatware and crystal glasses absolutely pop. Ever wondered why high-end restaurants always use moody greens? Now you know!
I highly recommend starting with a high-quality, unbleached linen or cotton blend. These fabrics absorb ink beautifully and give you that perfectly imperfect artisanal look. Plus, they feel incredibly luxurious under your fingertips. You can even mix and match different shades of green for a layered, sophisticated effect.

The Essential Block Printing Toolkit
Before you start stamping away like a chaotic artist, you need the right tools. FYI, skipping the basics just leads to smeared ink and sheer frustration. You need a linoleum block or soft rubber carving block, a sharp carving tool with different gauge blades, fabric-safe block printing ink, a brayer (that’s a fancy word for a roller), and a piece of glass to roll the ink out on. Essential gear checklist:
- Soft rubber carving blocks
- Assorted gauge lino cutters
- Fabric-safe green block printing ink
- Soft rubber brayer
- Clean glass or acrylic palette

Prepping Your Fabric for Success
You cannot just grab a new napkin and start stamping.
Brand new fabric contains sizing—a finish that stops ink from sinking in. You must wash and dry your linens first. Toss them in a warm wash with basic detergent.
Once dry, break out the iron. Wrinkles are the ultimate enemy of a crisp block print. You want a perfectly smooth, flat surface to guarantee the stamp makes even contact everywhere.
I always place an old towel under my printing area. This protects your table and gives you a soft backing that helps the stamp press deeply. If you want more ideas on eco-friendly fabrics, check out my guide to curating sustainable spring home decor.

Mixing the Perfect Festive Green
Finding that perfectly moody, festive green ink straight out of a tube rarely happens. I usually mix a vibrant emerald with a tiny drop of black or deep umber to tone it down and make it look expensive. You want a color that whispers “enchanted winter forest” rather than shouting “neon sports drink.” Squeeze a dollop of ink onto your glass palette and use a palette knife to blend it thoroughly. Roll your brayer back and forth until the ink sounds like sticky velcro—that means you have the perfect consistency!

Carving Your Holiday Block Design
Designing your stamp is arguably the most intimidating part, but it really shouldn’t be. Start simple! Think abstract pinecones, minimalist cedar branches, or geometric stars.
Draw your design directly onto the block with a soft pencil. Remember that your final print will be a mirror image of your carved block. Keep your non-carving hand behind the blade at all times, unless you fancy a quick trip to the emergency room.
Use a v-shaped tool to outline your shapes, then switch to a wider u-shaped gouge to clear away the negative space. You do not need to carve super deep; just remove enough material so the brayer only hits your raised design.

The Stamping Process
Now comes the thrilling part! Roll your ink-loaded brayer over your carved block, ensuring you coat the raised design completely and evenly. Press the block firmly onto your ironed linen. Do not rock it back and forth, or you will smudge the ink.
Apply even pressure with your hands, or use a clean brayer to press down on the back of the block. Lift the block straight up to reveal your beautiful, rustic design. IMO, those little imperfections where the ink doesn’t perfectly transfer just add authentic handmade charm. Keep stamping until you cover your entire napkin or runner!

Heat Setting Your Masterpiece
Patience is completely mandatory here.
You must let the ink dry completely before you do anything else. I typically leave my freshly printed green linens spread out on a drying rack for at least 24 hours.
Once the ink feels totally bone dry to the touch, you need to heat set it so you can actually wash these linens after your messy holiday dinner. Heat setting locks the pigment into the fabric fibers permanently.
Set your iron to the highest heat setting your fabric can handle. Place a scrap piece of cotton or a pressing cloth over your printed design and iron it firmly for about 3 to 5 minutes per section. Keep the iron moving slightly so you don’t scorch the fabric.

Styling Your New Festive Table
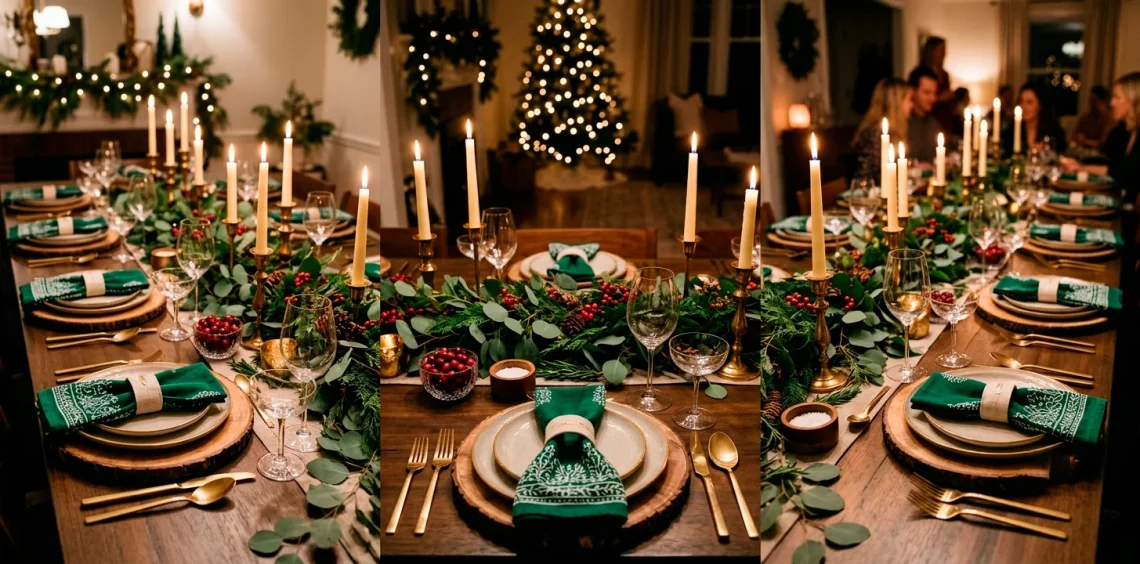
Your custom green linens deserve an equally gorgeous tablescape! I love pairing dark, leafy green block prints with rich brass accents, warm wood chargers, and a cluster of glowing taper candles. The contrast between the organic, handmade fabric and the metallic shine creates incredible visual interest. Add some fresh eucalyptus or pine sprigs down the center of the table to echo the botanical motifs on your napkins. You just created a bespoke holiday aesthetic that no one else has, and it looks wildly expensive! For more elegant tabletop inspiration, explore these coastal mediterranean thanksgiving tablescapes.

Washing and Caring for Hand-Printed Linens
Even though you heat-set the ink, you still need to treat these beautiful creations with a little respect. Skip the harsh bleach and aggressive stain removers.
I always wash my block-printed pieces on a gentle, cold cycle with a mild detergent. Hang them up to air dry to preserve both the fabric and the ink color. If they get a bit wrinkly, just iron them on the reverse side. Proper care guarantees your festive green linens will grace your holiday tables for decades to come!

Conclusion
Creating custom green linens through block printing is such a rewarding way to inject your personal style into holiday hosting. You get to play with ink, carve satisfying designs, and impress your guests with genuinely unique table decor. Grab those carving tools and start experimenting with your favorite botanical patterns today. Which design are you carving first? Let me know in the comments!