Skip to content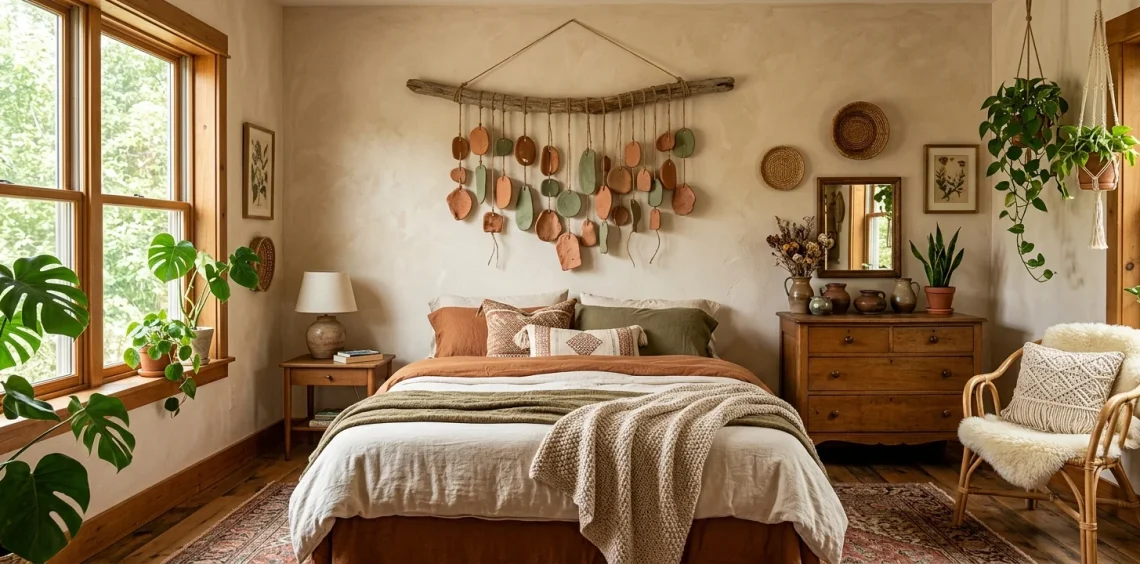
Tired of staring at that tragically blank space above your bed? I feel you. You crave something grounding, organic, and totally unique. Let me show you how to craft a stunning DIY clay wall hanging that transforms any bland room into an earthy sanctuary. Best of all, you get to brag that you made it yourself while saving serious cash in the process!
Why Air-Dry Clay is the Ultimate Cheat Code
Air-dry clay practically does the heavy lifting for you. You skip the expensive kiln firing entirely, which saves you a massive headache. IMO, working with this stuff feels like playing with adult playdough.
You just mold it, leave it alone, and let the air work its magic. The texture brings immediate warmth and a grounded aesthetic to your bedroom. Plus, who has the time or money to rent studio space for a single weekend project?

Gathering Your Earthy Crafting Arsenal
Before you get your hands dirty, you need the right tools. I usually grab a few essentials to make the process completely seamless.
Earthy crafting essentials:
- A sturdy rolling pin
- Parchment paper
- An X-Acto knife
- A wooden skewer
A useful little gift for your home
🎁 Free Plant Finder Tool
Filter 250+ houseplants by style, size, and care level to find your perfect green companion in seconds.
We’ll email you the link. Plus, you’ll join our newsletter for fresh home inspiration.
I once forgot the skewer step and had to drill through dried clay—spoiler alert, it shattered instantly. FYI, save yourself the tears and prep your tools first. Check out these beginner punch needle desk coasters if you crave more DIY vibes.

Rolling, Cutting, and Shaping the Magic
Toss a chunk of clay onto your parchment paper.
Roll it out until it hits a quarter-inch thickness. Too thin, and your shapes snap. Too thick, and they take three business days to dry.
Next, carve out your desired pieces. I personally love organic shapes like moons, sunbursts, and abstract arches. Keep your edges slightly uneven to boost that natural, handmade charm.
Got leftover scraps? Mash them together and roll them out again. Zero waste, total perfection. ✨

Adding Texture for That Organic Vibe
Smooth clay looks great, but textured clay screams expensive boutique decor. I highly recommend pressing natural elements directly into the wet clay. Grab a fallen leaf, a textured fabric scrap, or even a seashell, and push it gently into the surface. Peel it away, and you reveal a flawless imprint. Ever wondered why those high-end pieces look so appealing? It all comes down to texture.

The Dreaded Drying Phase (Patience Required)
Now comes the hardest part of any DIY project. You literally have to walk away and do nothing.
Place your cutouts on a wire rack to ensure air circulates around both sides. Flip them gently every few hours during the first day so they dry flat.
If you leave them flat on the paper, the edges tend to curl up like a stale potato chip. We want chic decor, not Pringles. Give them about 24 to 48 hours to fully cure.

Sanding Your Masterpiece to Perfection
Once your clay pieces feel rock solid, grab some fine-grit sandpaper. Gently smooth out any harsh edges or weird bumps you missed during the cutting phase.
I usually do this outside because clay dust gets absolutely everywhere. You only need a light touch to refine the shapes without losing that handmade character. Wipe everything down with a slightly damp cloth to remove the dust residue before you move on to painting.

Painting and Sealing Your Clay Moons and Leaves
You can leave the raw clay as is, but a splash of paint elevates the design.
Terracotta, mustard yellow, and sage green acrylics perfectly match that earthy bedroom aesthetic.
Paint a few geometric lines, or coat the entire piece in a single solid tone. I always prefer matte finishes over glossy ones for a natural look.
After the paint dries, brush on a clear matte sealer. This protects your hard work from humidity and prevents the color from chipping off.

Stringing It All Together with Twine
Now you assemble the puzzle. Thread natural jute twine or a thick cotton cord through the holes you poked earlier. Tie a sturdy knot at the back of each shape to hold it securely in place. You can stack three or four shapes vertically on a single string, or create a wider piece by tying multiple strings to a piece of driftwood. I love using driftwood because it brings an extra touch of the outdoors right into your space.

Hanging Your New Earthy Masterpiece
Find the perfect spot above your bed, next to a window, or beside your vanity. Tap a simple brass nail into the wall and hang your creation.
Step back and admire your handiwork. You just transformed basic craft supplies into a stunning statement piece! 🌿
The natural tones immediately cozy up the room and tie all your wooden furniture together. Need more cozy inspiration? Try styling your space with bohemian home library macrame floor pillows for the ultimate earthy retreat.

A useful little gift for your home
🎁 Free Plant Finder Tool
Filter 250+ houseplants by style, size, and care level to find your perfect green companion in seconds.
We’ll email you the link. Plus, you’ll join our newsletter for fresh home inspiration.
Conclusion
Crafting your own decor brings so much personality into your living space. This DIY clay wall hanging project proves you do not need a massive budget to achieve an earthy, grounded aesthetic. You just need a little patience, some air-dry clay, and your own creativity. Which shape are you cutting out first? Let me know in the comments below!