That lonely corner in your living room begs for a purpose beyond collecting dust. I remember my first DIY bar attempt; I shoved a wobbly cart against a wall and called it a day. Big mistake. You need a space that actually works when the drinks start pouring. Why settle for a cluttered mess when you can build a sleek, functional masterpiece? I’ve learned that a great bar depends on movement, not just expensive bottles. Let’s get your home bar project moving in the right direction.
Hunting for the Perfect Real Estate
Location dictates everything. Do you want to hide your stash in a moody basement or keep it front and center? IMO, the best bars live where the action happens, usually near the kitchen or lounge. Avoid high-traffic hallways unless you enjoy getting bumped while measuring bitters. I look for natural light for daytime vibes but ensure I have enough wall space for heavy-duty shelving. Why put your bar in a dungeon when you can host in the light? Pick a spot that invites people to linger without blocking the path to the bathroom.
- Evaluate foot traffic.
- Check for electrical outlets.
- Prioritize social accessibility.
The Golden Rule of Bar Ergonomics
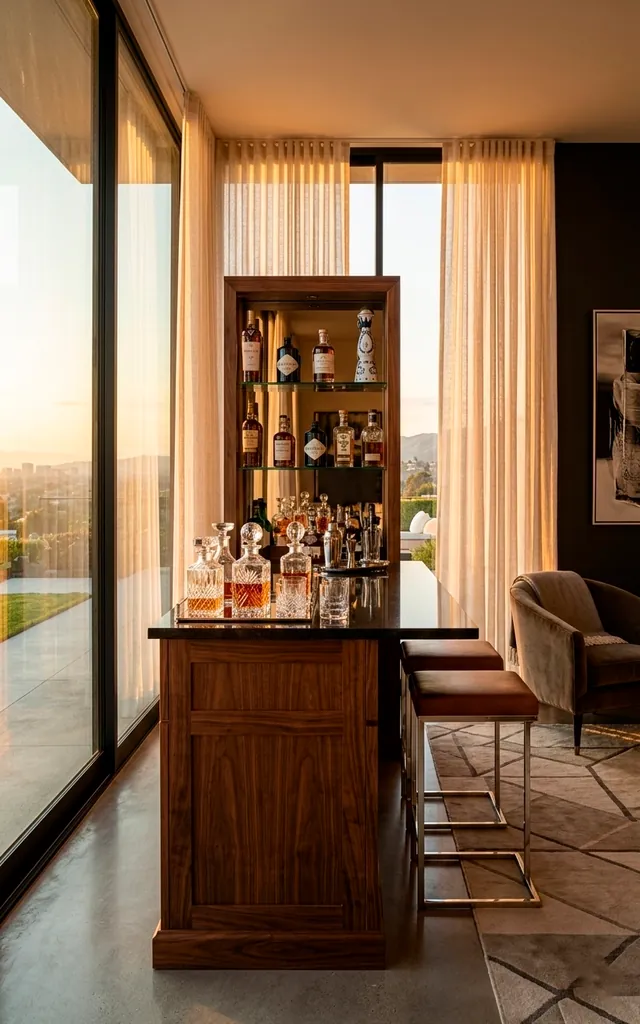
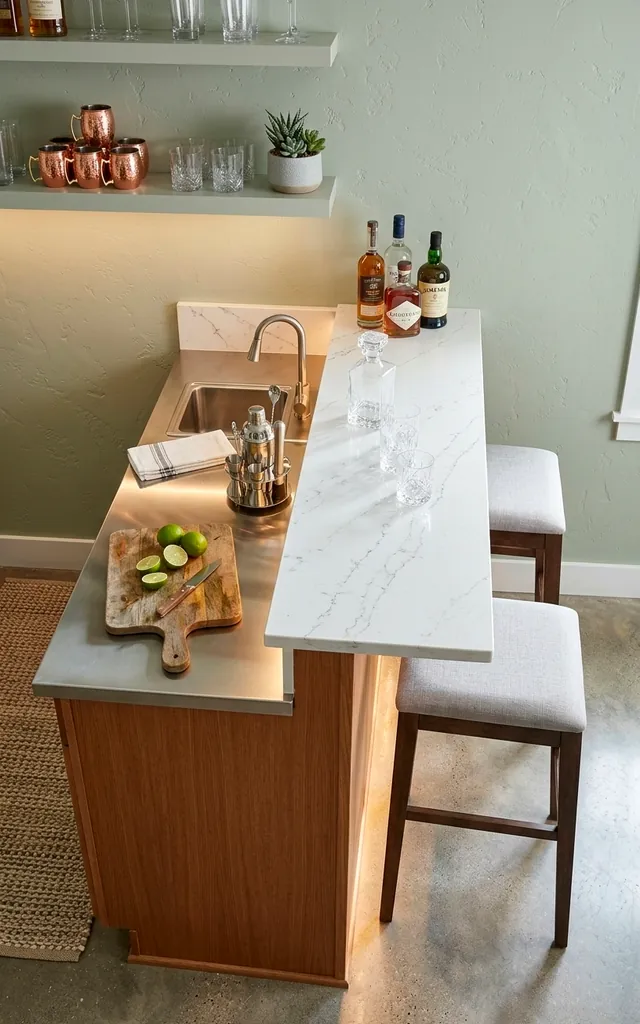
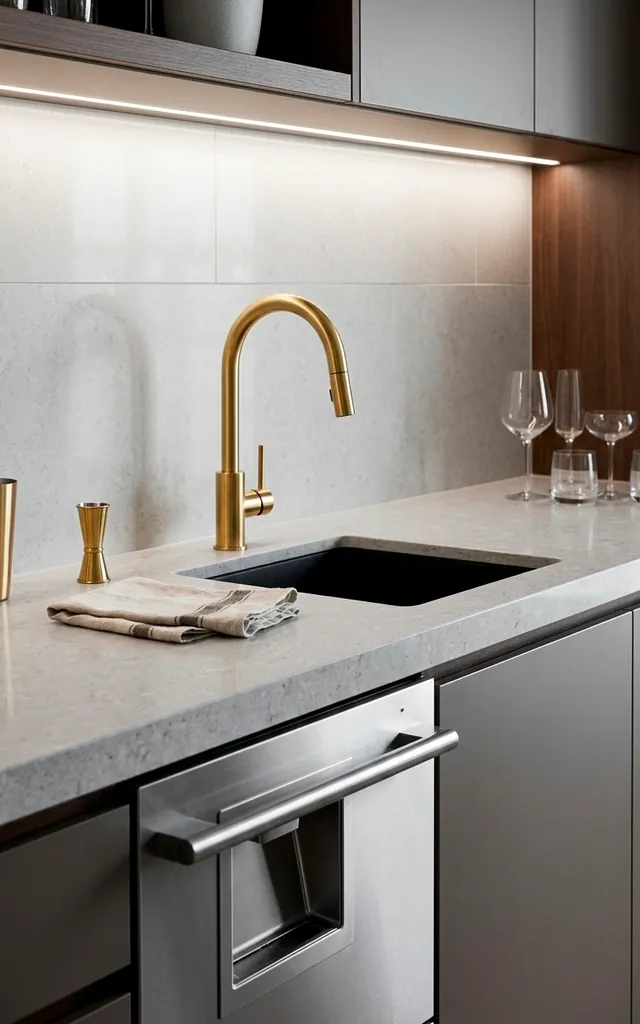
Ever tried to shake a martini in a broom closet? It’s a disaster. You need at least 36 inches of clearance behind the counter to move freely. I always design with the ‘work triangle’ in mind: ice, sink, and bottles should all stay within arm’s reach. Don’t make your guests wait while you trek across the house for a garnish. I prefer a multi-level counter design. It hides the messy prep work from the guests while providing a clean surface for their drinks.
- Keep frequently used tools centered.
- Ensure ample elbow room.
- Separate the prep zone from the serving zone.
Storage Solutions That Actually Work
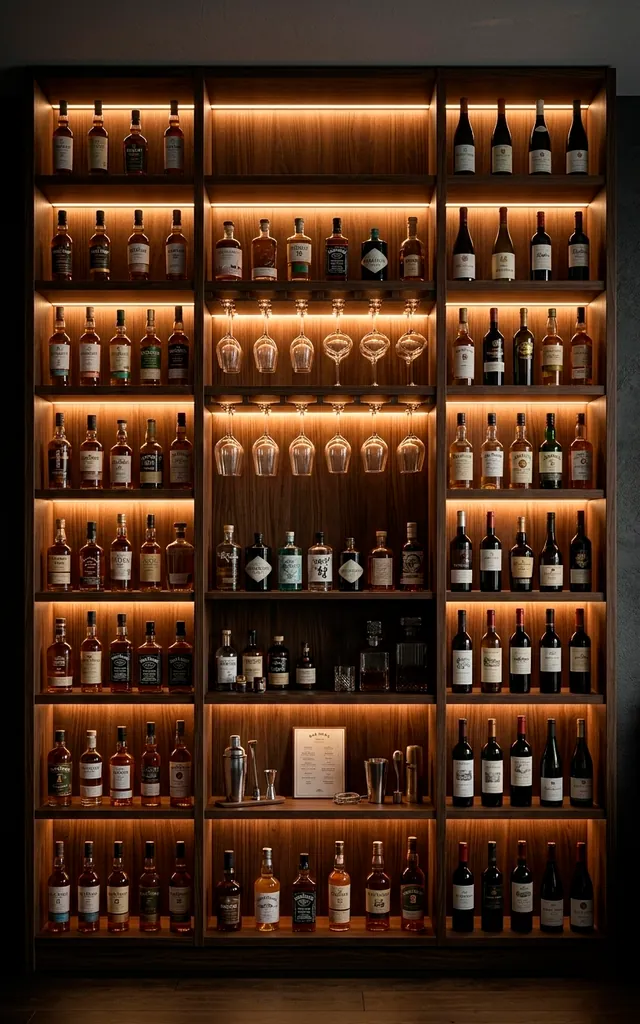
Standard cabinets often fail the ‘tall bottle’ test. I’ve seen too many people store their expensive bourbon sideways because the shelves were too short. Don’t be that person. I recommend adjustable shelving to accommodate everything from tiny bitters to tall vodka bottles. Open shelving looks great, but it’s a total dust magnet. Use it for the pretty stuff and hide the plastic liter bottles behind closed doors.
- Install stemware racks under cabinets.
- Use pull-out bins for mixers.
- Invest in reinforced shelving for heavy glass.
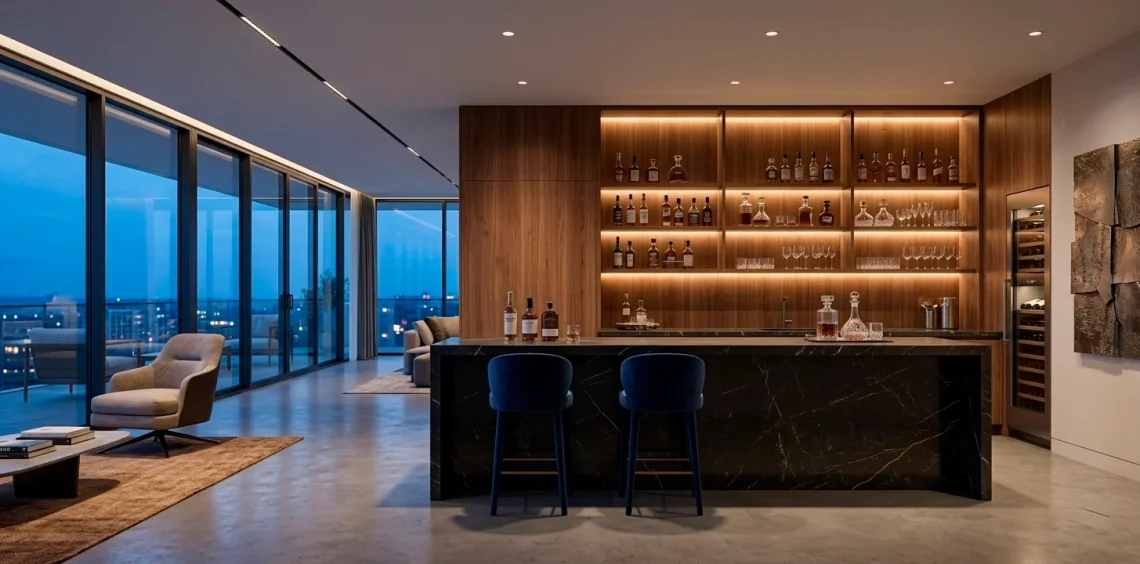
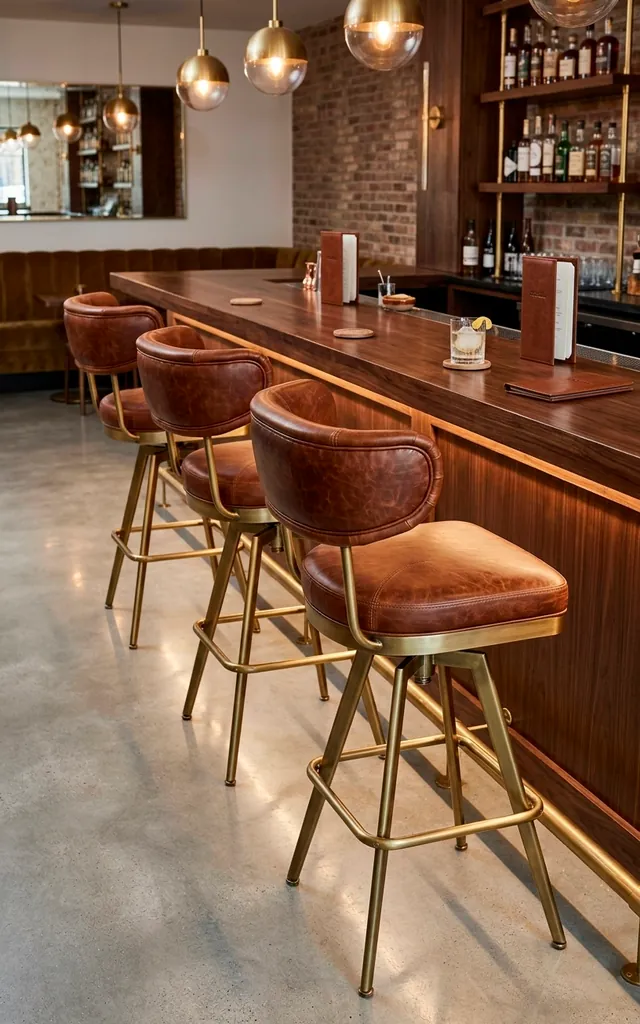
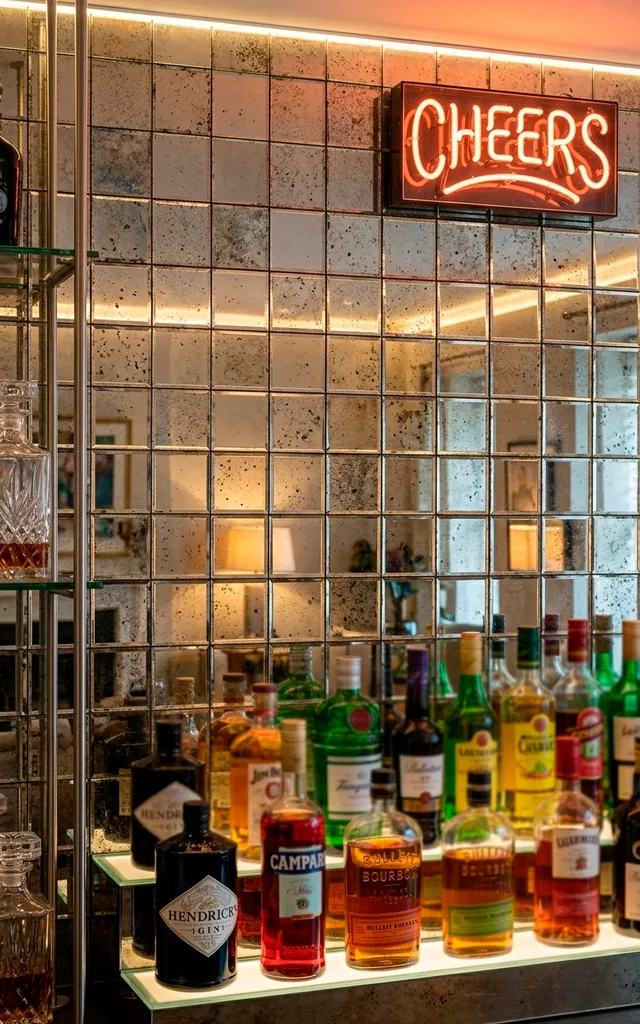
Setting the Mood with Lighting
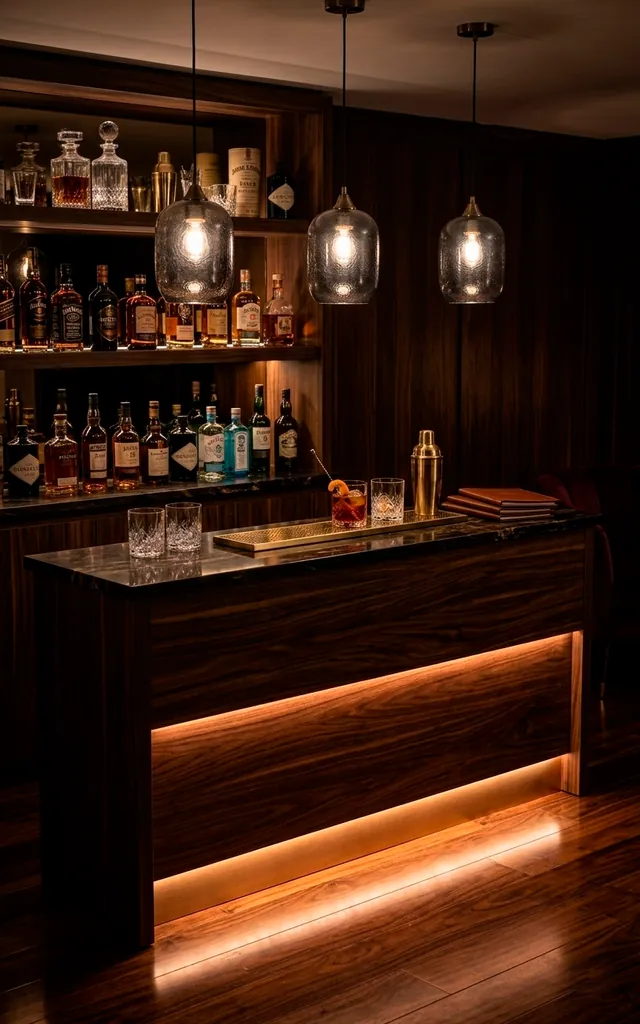
Nothing kills a vibe faster than bright overhead lights. Do you want your bar to feel like a lounge or a surgical suite? I always install dimmer switches for every single light source. Pendant lights over the counter provide great Task lighting, but I love LED tape lights under the lip of the bar for that ‘floating’ effect. It’s a cheap way to make a basic setup look like a million bucks.
- Use warm-toned bulbs (2700K).
- Add accent lighting to bottle displays.
- Avoid harsh shadows on the prep area.
The Wet Bar vs. Dry Bar Dilemma
Do you really need a sink? FYI, plumbing adds a few thousand to your budget instantly. If you host large parties, a wet bar is a lifesaver for rinsing tins and dumping ice. However, I think a dry bar works perfectly for most people if you have a kitchen nearby. Spend that saved plumbing money on a better beverage cooler or a high-end ice maker instead. Who wants to deal with a leaky drain anyway?
- Consider distance to the kitchen.
- Budget for professional plumbing.
- Factor in ventilation for fridges.
Seating That Doesn’t Hurt
I’ve sat on enough ‘artistic’ bar stools to know that comfort usually comes last. Don’t do that to your friends. If you want people to stay for more than one drink, pick stools with back support and footrests. I prefer swivel stools because they make getting in and out of tight spots way easier. Ensure you leave about 12 inches between the seat and the counter so people actually have room for their legs.
- Measure counter height accurately.
- Choose easy-to-clean fabrics.
- Opt for sturdy frames over flimsy metal.
The Finishing Touches
A bar without accessories is just a table with bottles. I like to add a bit of personality with a unique backsplash—think mirrored tiles or reclaimed wood. Don’t forget the functional decor like high-quality coasters and a heavy-duty bar mat. These small items protect your investment and make you look like a pro. Does your bar reflect your style, or does it look like a showroom floor? Throw in a vintage neon sign or some quirky glassware to break the ice.
- Add a mirrored backsplash for depth.
- Use decorative trays to group items.
- Display fresh garnishes in glass jars.
Cheers to Your New Favorite Spot
Building a home bar is about more than just booze; it’s about creating a destination. Focus on the flow, keep the lighting low, and please, for the love of your guests, buy comfortable stools. I promise that a well-planned layout beats a fancy countertop every single time. Ready to start pouring? Your dream setup is just a few measurements away. I can’t wait to see what you build! 🙂