Skip to content
Ever walk into your laundry room and instantly want to walk right back out? Yeah, me too. The endless piles of detergent bottles and mismatched lost socks can completely drain your soul. But guess what? Adding some DIY open shelving changes everything. You gain serious storage space and actually make the room look styled. Time to fix that blank wall!
Embracing the Open Shelf Life
Why do we hide our laundry supplies in ugly wire racks? It makes zero sense. Open shelving forces you to keep things tidy while giving you a perfect excuse to buy aesthetic glass jars for your powdered detergent.
I built my first set of laundry room shelves last year, and honestly, I kick myself for not doing it sooner. You don’t need a woodworking degree to pull this off. Just a little patience and a solid game plan. Ready to transform your space from a literal dumping ground into a room you actually don’t hate being in?

Gathering Your Arsenal
Before you start making random holes in your drywall, you absolutely need to gather the right tools.
Trust me, running back to the local hardware store mid-project because you forgot a drill bit is the absolute worst. It kills your momentum instantly.
A useful little gift for your home
🎁 Free Plant Finder Tool
Filter 250+ houseplants by 6 smart criteria to find your perfect green companion.
We’ll email you the link. Plus, you’ll join our newsletter!
You probably already own most of this stuff in that messy garage of yours anyway.
Essential shelf-building gear:
- A highly reliable stud finder (do not skip this)
- Power drill with appropriate wood bits
- Heavy-duty metal shelf brackets
- A standard 24-inch bubble level
- Sandpaper and your favorite wood stain

The Art of Measuring
Measure twice, cut once. We all know the cliché, but it exists for a very good reason. Grab your measuring tape and figure out exactly how much vertical space you have above your washer and dryer. You want enough clearance so you aren’t slamming your head against a solid pine board every time you reach for the fabric softener. I highly recommend leaving at least 18 inches between shelves. This gives you plenty of breathing room for those bulky detergent jugs and tall spray bottles. IMO, mapping it out with painter’s tape on the wall first saves you from massive regrets later.

Picking the Perfect Wood
Not all wood is created equal, especially when it comes to supporting heavy glass bottles of liquid.
You could easily grab some cheap MDF, but moisture from the washing machine will eventually ruin it. Solid wood acts as your best friend here. Pine is super budget-friendly and takes stain reasonably well if you properly use a pre-stain wood conditioner first.
If you want something that looks expensive without completely draining your wallet, try common white wood boards or even oak if you feel extra fancy. Thickness matters, so aim for boards that are at least 1.5 inches thick to prevent annoying sagging over time.

The Stud Finder Struggle
Let me guess, you just bought a stud finder, scanned it across your chest, and made the mandatory ‘found one!’ joke? Classic. Now use it on the actual wall. Laundry supplies get incredibly heavy, so anchoring your brackets directly into the wall studs is strictly non-negotiable.
Drywall anchors look cute for hanging lightweight picture frames, but they will absolutely rip right out of the wall under the weight of a mega-sized laundry detergent. Mark your studs clearly with a pencil. If your studs simply do not align perfectly where you want the shelves, you might need to install a decorative mounting board first.

Installing the Brackets
Here comes the fun part where things actually start looking like real furniture.
Hold your first bracket against your stud mark and grab your bubble level. If it isn’t perfectly straight, you will end up with liquid soap slowly sliding off the edge onto the floor.
Seriously, take your time with this step. Crooked shelves will absolutely haunt your dreams every time you do laundry.
Pro bracket installation tips:
- Pre-drill small pilot holes to stop your wood from splitting
- Drive the top screw in loosely first to hold the weight
- Double-check your level before tightening everything down
- Repeat the exact process for the second bracket on the adjacent stud

Sanding and Staining Your Boards
Nobody wants a nasty splinter while rushing through Sunday chores. Grab some 120-grit sandpaper and smooth out those rough edges until they feel like butter. Wipe away the dust with a tack cloth before you even think about opening your wood stain. I personally love a warm walnut finish because it hides dust beautifully and gives off a cozy, slightly rustic vibe. Apply the stain with a clean rag, let it sit for five minutes, and wipe off the excess. Always seal your boards with polyurethane to completely protect them from inevitable liquid spills and detergent drips.

Securing the Shelves
Your heavy brackets are firmly up, your stained boards are completely dry, and the finish line is clearly in sight.
Lift your beautifully finished boards onto the metal brackets. Most heavy-duty brackets feature small holes underneath specifically designed for securing the shelf. Drive some short wood screws through these specific holes directly into the bottom of your boards.
This simple step prevents the wood from sliding forward or tipping if you accidentally bump it with a heavy laundry basket. Give the shelf a firm wiggle. If it doesn’t move, you officially did it right! Now stand back and admire your handiwork.

Styling Your Hard Work
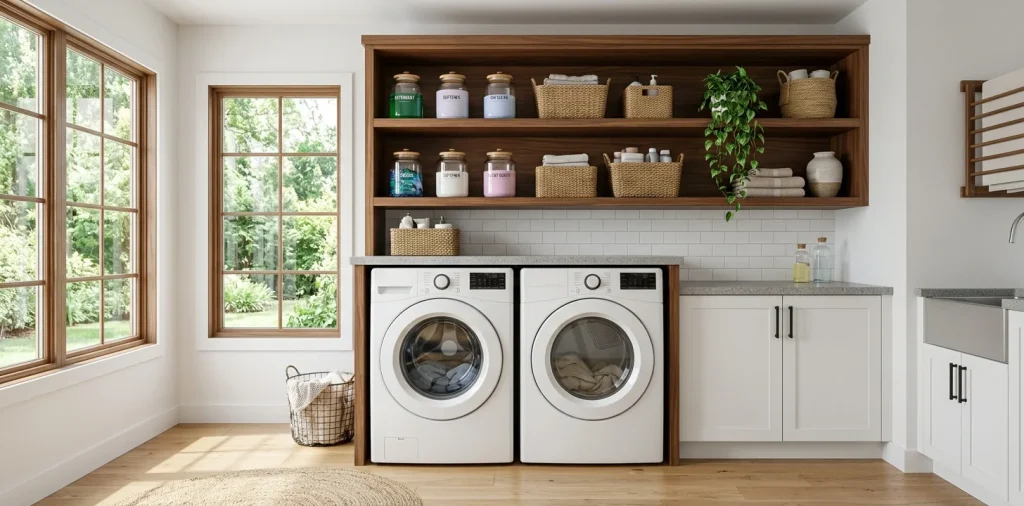
You didn’t build these gorgeous shelves just to throw ugly plastic jugs back on them, did you? 🤦♀️ Pour your liquid detergents into sleek glass dispensers and use large woven baskets to cleverly hide the visually unappealing stuff like stain removers and bulky lint rollers.
Add a small faux trailing plant for a vibrant pop of color, because even laundry rooms deserve good aesthetics. Group your items in odd numbers to keep things visually interesting. Your newly upgraded space is now incredibly functional and surprisingly stylish! If you want to keep optimizing this area, definitely check out this minimalist laundry room organization guide.

A useful little gift for your home
🎁 Free Plant Finder Tool
Filter 250+ houseplants by 6 smart criteria to find your perfect green companion.
We’ll email you the link. Plus, you’ll join our newsletter!
Conclusion
So there you have it—a completely doable weekend project that drastically improves your weekly laundry routine. Building your own open shelving saves you money, maximizes your vertical space, and instantly elevates the vibe of the entire room. You finally have a dedicated spot for everything! Are you planning to stain your wood dark or keep it light and natural? Let me know in the comments below!