Skip to content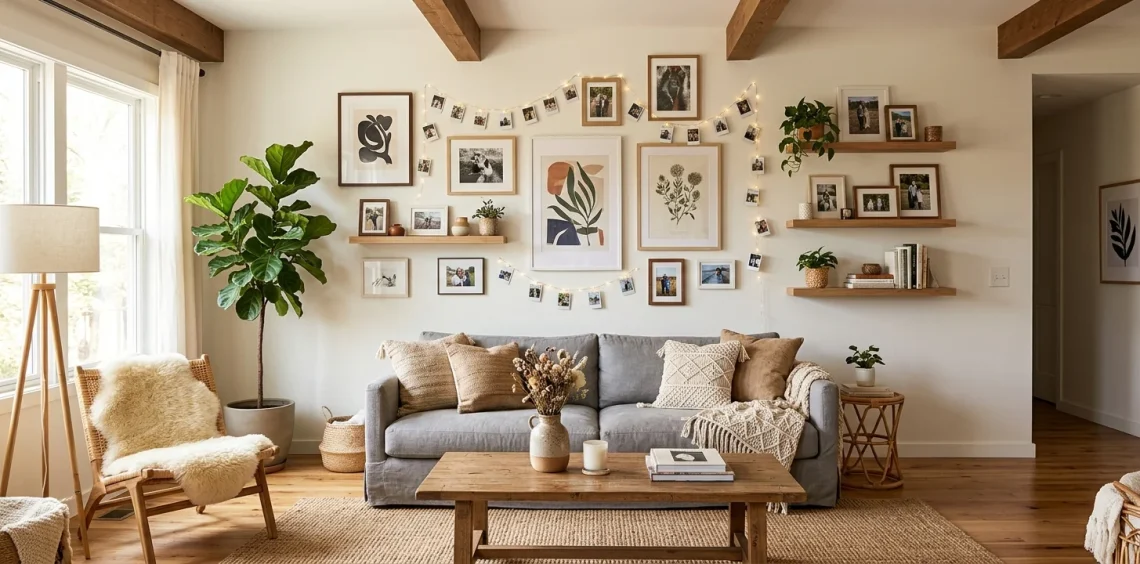
We all have thousands of photos trapped inside our phones, gathering digital dust. Why not bring those favorite memories out into the real world? Turning your blank walls into a massive shrine of your best moments adds instant warmth to any room. Grab a hammer and some command strips, because I am sharing my absolute favorite ways to display photos.
String Lights & Polaroids
Want to instantly make your bedroom feel like a cozy indie movie set? String lights and polaroids always create absolute magic. You just clip your favorite snapshots right onto the glowing wire using mini wooden clothespins. It literally takes ten minutes to hang up.
I actually did this above my bed last winter, and it completely transformed the late-night vibe. You get ambient lighting and a trip down memory lane all at once. Plus, swapping out the pictures takes zero effort when you print new ones. For more glowing inspiration, check out these magical fairy light ideas.

The Reclaimed Wood Ledge
Building a rustic photo ledge gives you maximum flexibility. You can just prop your frames up and lean them against the wall!
No more putting a dozen extra holes in your drywall just because you bought a new picture frame. You simply line up different sizes of frames on the wooden shelf, overlapping them slightly for that effortlessly chic look. IMO, the messy overlap actually makes it look better.
A useful little gift for your home
🎁 Free Plant Finder Tool
Filter 250+ houseplants by style, size, and care level to find your perfect green companion in seconds.
We’ll email you the link. Plus, you’ll join our newsletter for fresh home inspiration.
Materials needed:
- Reclaimed wood board
- L-brackets
- Wood stain
- Sandpaper
You can source old barn wood online or check your local hardware store’s scrap pile.

Minimalist Wire Grid Panels
Minimalist wire grids look super sleek and keep your space feeling uncluttered. You just lean a large metal grid against your desk wall and use binder clips to attach your photos, concert tickets, and postcards. It gives off major cool-girl office vibes while letting you update your mood board daily. You literally just squeeze a clip and bam, fresh aesthetic. FYI, if your home office needs a quick revamp, this takes the crown.

Floating Acrylic Frames
Acrylic frames look incredibly high-end, don’t they? They make your photos look like they magically levitate right off the wall.
You secure two thick sheets of clear acrylic together with standoff hardware at the corners. The transparency lets your wall color peek through the edges, creating a seamless gallery effect.
I definitely recommend using these for bold, colorful art prints or oversized family portraits. They grab all the attention without adding visual bulk to your room.
Tools you want on hand:
- Clear acrylic panels
- Silver or brass standoff mounts
- Power drill
Just take your time measuring those drill holes!

Vintage Window Pane Revival
Scour your local flea market for an old wooden window frame with multiple glass panes. You can tape different photos behind each individual pane to create a stunning, multi-picture masterpiece.
Leaving the chipped paint intact adds so much authentic character. You just secure your pictures to the back of the glass using double-sided tape. It becomes a massive statement piece that guests immediately notice when they walk in.

Natural Branch & Twine Hanging
Bring a touch of nature indoors with a simple branch hanging. You forage a sturdy, beautiful tree branch from your yard, tie several varying lengths of twine to it, and attach your photos down the strings with mini clips. This boho-chic display adds incredible organic texture to stark, boring walls. Plus, it costs absolutely nothing if you already own twine and scissors. Talk about a budget-friendly glow-up!

The Industrial Clipboard Gallery
Want an edgy, industrial look that allows instant photo updates? Hang a symmetrical grid of wooden clipboards flat against your wall.
You simply clip your standard 8×10 prints right onto them. When you get bored of a picture, you just unclip it and slap a new one up there. No messing with glass, no prying open frame backs with a butter knife and ruining your manicure.
This layout looks exceptionally smart in a home office or a teenage bedroom. The strict grid formation balances the casual nature of the exposed clips. Need more help keeping your workspace sharp? Try these tips for an aesthetic clean desk setup.

Magnetic Chalkboard Wall
Painting a section of your wall with magnetic chalkboard paint gives you the ultimate interactive canvas. You literally create a giant, moody backdrop for your pictures!
Design elements:
- Magnetic primer base
- Black chalkboard topcoat
- Small neodymium magnets
- White chalk markers
You can draw cute borders around your photos or write dates and funny captions right on the wall. It feels like a real-life scrapbook.

Intricate Macrame Photo Hanger
Macrame brings incredible softness to any room. You can weave a simple wall hanging that incorporates wooden beads and woven pockets specifically designed to hold your favorite prints.
Honestly, tying those knots becomes a very therapeutic weekend activity. You just loop your cotton cord over a wooden dowel and follow a basic square knot pattern.
You slip your photos between the woven ropes, creating a beautiful blend of textile art and personal memory.
The natural cotton fibers contrast beautifully against glossy photo paper. It practically begs your guests to step closer and admire the intricate details.

Repurposed Bicycle Wheel
Do you love quirky, upcycled decor? 🚲 Grab an old bicycle wheel, clean up the metal spokes, and hang it directly on your wall. You just slide your photos between the tensioned spokes or secure them with tiny clips. The circular shape naturally breaks up all the boring square angles in a typical living room. It serves as a fantastic conversation piece that brilliantly displays your favorite snapshots.

Washi Tape Frames
Renters, listen up! 📣 Washi tape offers the ultimate damage-free solution for framing photos.
You just tape your photos flat against the wall and use different colors and patterns of washi tape to create fake frames around the borders. You can do simple black lines for a modern look, or use floral patterns for something sweeter.
Washi styling tips:
- Create double layered borders
- Use metallic gold tape on black-and-white photos
- Mix and match geometric shapes
It costs pennies and peels right off when your lease ends!

Geometric Cork Board Tiles
Forget those boring rectangular cork boards from your middle school classroom. Buy hexagon-shaped cork tiles and stick them to your wall in a sprawling honeycomb pattern.
You pin your photos directly to the cork using sleek metallic pushpins. You can leave some hexagons blank, paint a few of them with acrylic paint, and completely cover others with pictures. This modular system grows easily whenever you print new batches of photos.

Glass Bottle Memory Jars
Why must photos always stick to a wall? Rolling up a photograph and slipping it inside a clear vintage apothecary bottle creates a captivating, three-dimensional display.
The curved glass slightly magnifies and distorts the image, giving it an incredibly cool, dreamlike quality.
I recommend adding a little dried lavender, sand, or some tiny fairy lights inside the bottle behind the picture.
You just line up three or four of these memory jars on a sunny windowsill or a fireplace mantel. It feels like capturing a precious moment in a bottle!

Ombre Painted Wooden Blocks
You can buy cheap wooden craft cubes, paint them in a gorgeous ombre color gradient, and cut a thin slit across the top of each block using a hand saw. You then just slide your favorite thick cardstock photos right into those slots. These little photo stands look amazing scattered across a bookshelf or clustered tightly on a coffee table. It totally elevates standard prints into chunky, modern tabletop art.

The Hanging Embroidery Hoop Mobile
Grab a large wooden embroidery hoop and tie ribbons or clear fishing line across the center, creating a delicate web.
You hang this hoop horizontally from the ceiling, and then dangle your pictures down from the edges and the center using more transparent thread. The photos slowly spin and catch the breeze whenever someone walks by! It completely fills an empty corner with kinetic energy and joyful memories.

A useful little gift for your home
🎁 Free Plant Finder Tool
Filter 250+ houseplants by style, size, and care level to find your perfect green companion in seconds.
We’ll email you the link. Plus, you’ll join our newsletter for fresh home inspiration.
Conclusion
Your space should boldly reflect exactly who you are and the people you love. Ditching those standard, boring picture frames for a few creative DIY methods breathes so much fresh life into your decor. Whether you embrace the rustic wooden ledge or go full quirky with an old bicycle wheel, your memories deserve to shine. Which project are you grabbing your tools for first? Let me know in the comments!