Skip to content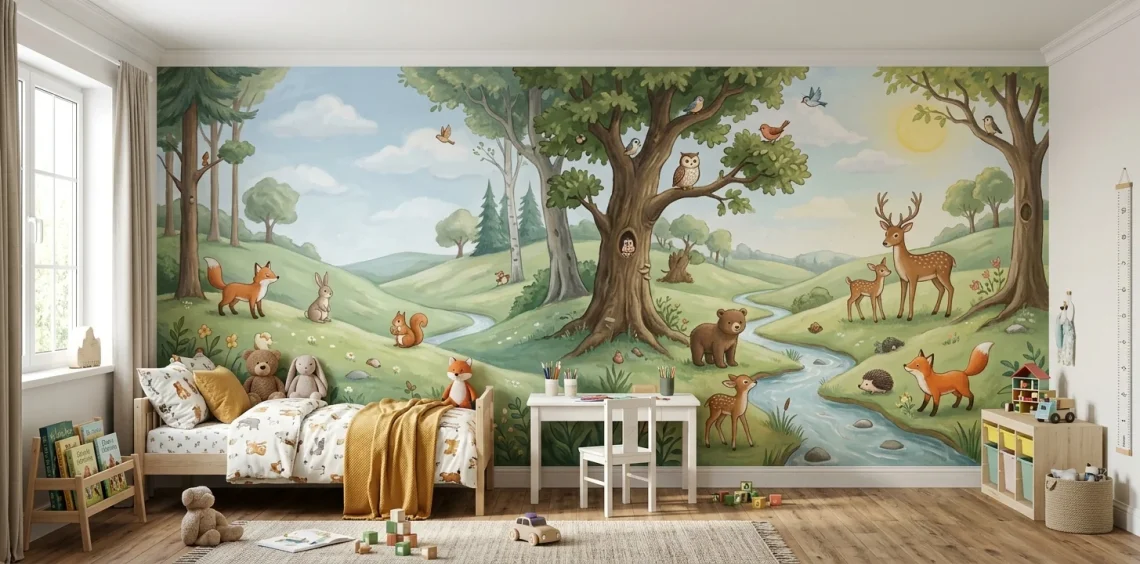
Ever stared at a blank bedroom wall and thought it desperately needed some life? Painting a mural might sound terrifying, but it’s actually totally doable. I remember trembling with a brush before tackling my niece’s room, only to realize it’s basically just a giant coloring book! Grab your paint clothes, because we’re making some mural magic today. 🎨
Prepping Your Canvas (The Boring but Crucial Stuff)
So, you want to jump straight into painting rainbows and unicorns? Hold that thought. Skipping the prep work guarantees a peeling, tragic mess.
You absolutely must wash the wall first. Grab a damp cloth, wipe down all that mystery grime, and let the surface dry completely. Once clean, slap on a solid layer of painter’s tape around the trim.
Finally, roll on a high-quality primer. It makes those vibrant colors pop instead of soaking miserably into the drywall. Trust me, future you will be grateful for this step. Protect those floors with a luxury kids bedroom area rug before dripping paint!

Sketching the Vision (Don’t Wing It)
Winging it sounds incredibly romantic until you end up with a majestic giraffe that suspiciously looks like a lumpy camel. Sketch your design on paper first, then use a digital projector to cast it directly onto the wall. If you don’t own a projector, a basic grid method works wonders for scaling up your art. Simply trace the lines lightly with a watercolor pencil, because regular graphite smears everywhere and ruins your light colors. You got this, and mapping it out makes the whole process stress-free! ✏️
A useful little gift for your home
🎁 Free Plant Finder Tool
Filter 250+ houseplants by style, size, and care level to find your perfect green companion in seconds.
We’ll email you the link. Plus, you’ll join our newsletter for fresh home inspiration.

Choosing the Right Arsenal (Paints and Brushes)
Paint shopping is hands down the best part, IMO. But don’t just grab whatever looks shiny in the craft aisle.
You need interior latex paint for the large background areas like skies or fields. It’s highly durable, easy to clean, and covers a massive amount of ground very fast.
For the finer, intricate details, high-quality acrylic craft paints are your absolute best friends. They mix beautifully, dry fast, and hold their vibrant pigments.
Essential mural tools:
- High-density foam rollers for smooth skies
- Assorted synthetic bristle brushes
- A sturdy plastic drop cloth
- Paint palettes or old paper plates

Laying Down the Background Vibes
Start huge and work your way down to the tiny stuff. Slap on those massive blocks of color first—like the sprawling blue sky, the deep ocean, or the rolling green hills. Working back-to-front creates a natural depth that automatically makes the scene pop. Have you ever noticed how professional paintings look layered? That is exactly how they achieve it!
Use your foam rollers here to get a flawlessly smooth finish. Don’t stress if the first coat looks a bit streaky or uneven; a second coat will magically fix almost everything and lock in that solid color.

Bringing the Characters to Life
Now for the genuinely fun part! Grab your smaller brushes and start blocking in the main characters, towering trees, or cute spaceships. Focus strictly on solid, flat colors first before worrying about complex shading. Think of it like building a house; you need a solid foundation before you hang the fancy curtains. Fill in the bold shapes confidently. This stage instantly transforms your weird abstract wall blobs into recognizable friends!

Shading, Highlighting, and Adding Personality
Flat shapes are perfectly fine, but a little shading makes things incredibly dynamic. Want to know a secret? A tiny white dot in a cartoon eye makes it look instantly alive.
Mix a slightly darker shade of your base color and blend it along the edges to create soft shadows. Then, add a lighter shade on the absolute opposite side for a gorgeous, sun-kissed highlight.
Please don’t overthink this process. Kids aren’t stuffy art critics looking for Renaissance-level lighting; they just want a cool, smiling dinosaur on their wall. Keep your strokes playful and loose!

Embracing the Oops (Fixing Mistakes)
Spoiler alert: you will definitely mess up at some point. Your brush will randomly slip, or the dark blue paint will drip right onto your perfectly round, yellow sun.
Keep a damp rag handy to wipe up fresh drips immediately. If the mistake fully dries before you catch it, simply paint right over it once it cures. That’s the absolute beauty of acrylic paints—they are completely forgiving and hide all our little sins!

Sealing Your Masterpiece
After pouring your heart and soul onto that drywall, you better protect it. Kids are messy, and those sticky, mystery-stained fingers will inevitably find their way to your beautiful art.
Apply a clear, water-based polyurethane topcoat once everything is completely dry.
Wait at least a full 24 hours before sealing it. Rushing this specific step will smear your beautiful hard work into a tragic, muddy puddle.
Roll it on gently and evenly. Two thin coats will successfully keep your mural safe from flying toys, rogue crayons, and general toddler chaos.

The Final Tape Peel Reveal
Peeling off that blue painter’s tape is arguably the most deeply satisfying feeling on the planet. Seeing those crisp, clean edges instantly makes the whole project look totally professional and finished.
Step back and admire exactly what you just created! You didn’t just paint a wall; you built an entirely new, immersive world for a kid to dream in. That is some serious magic right there, and you should be insanely proud of your hard work.

Adding 3D Elements (Optional Magic)
Want to really blow their tiny minds? Try mixing some physical, 3D elements directly into your painted scene. Glue lightweight wooden stars over a painted galaxy, or attach real faux-leaves to your painted jungle trees. This hybrid approach adds insane texture and makes the room feel like an interactive theme park. Plus, it covers up any weirdly painted spots perfectly! FYI, just make sure any glued items are completely secured so they don’t become late-night tripping hazards.

A useful little gift for your home
🎁 Free Plant Finder Tool
Filter 250+ houseplants by style, size, and care level to find your perfect green companion in seconds.
We’ll email you the link. Plus, you’ll join our newsletter for fresh home inspiration.
Conclusion
Creating a hand-painted bedroom mural is such a rewarding weekend project that totally transforms a room. Don’t let the fear of a crooked line stop you from making something incredibly special. Grab some brushes, put on a fun playlist, and let your imagination take the wheel. Which theme are you painting first? let me know in the comments! 👇