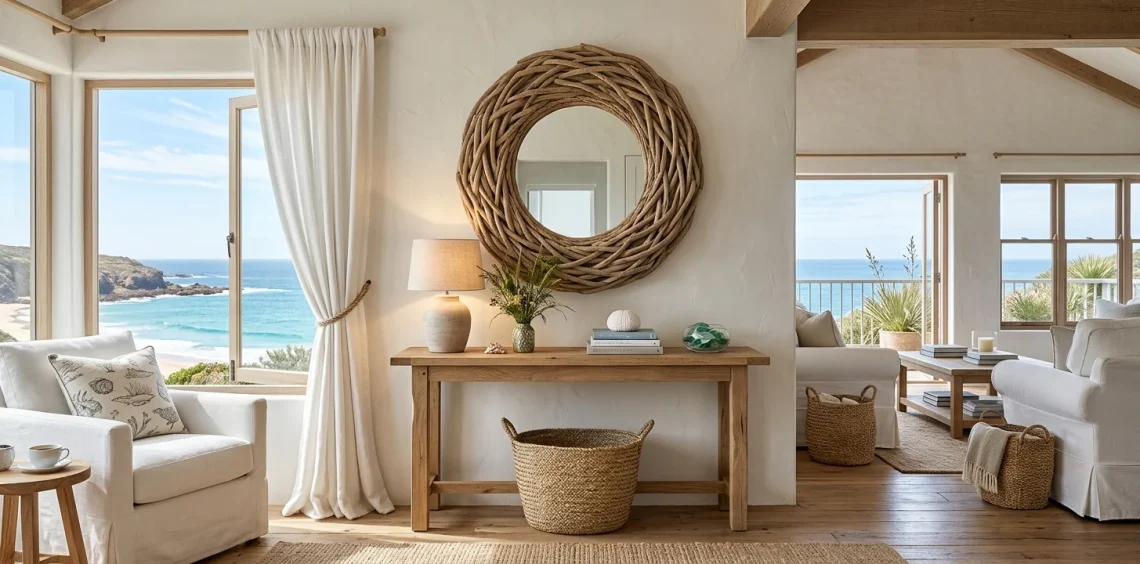
Craving that relaxed, beachy aesthetic without spending a fortune at high-end boutiques? You completely control your home’s vibe, and nothing screams coastal chic quite like a DIY driftwood mirror. I absolutely love how raw wood brings instant warmth and texture to any stark wall. Grab your glue gun, and let’s craft a stunning focal point together!
Why Driftwood is the Ultimate Decor Vibe
Ever wondered why high-end designers obsess over natural textures? Organic elements instantly soften rigid architectural lines and make a room feel lived-in rather than staged 🌊. I remember hanging my first handmade wood piece; the entire room suddenly breathed easier. You simply cannot replicate the weathered charm of real driftwood with factory-made plastic clones.
Plus, every single stick carries its own unique history and character. You bring a tiny piece of the ocean’s journey right into your living space. Boldly textured accents like this mirror instantly elevate your coastal aesthetic from basic to bespoke.

Foraging vs. Buying Your Wood
You basically have two paths here: hunt for it or hit ‘add to cart.’ Foraging at your local beach offers a fun weekend adventure and zero material cost, but you must thoroughly sanitize everything you find. Honestly, I once brought home a gorgeous branch only to discover a family of spiders living inside it! If you prefer a bug-free, immediate start, buying pre-cleaned driftwood pieces online saves you serious time. You get perfectly sized, ready-to-use pieces that eliminate the messy cleaning phase entirely. Which route suits your DIY style?

The Essential Supply List
Nobody wants to pause a creative flow just to run to the hardware store. You need a solid game plan before the glue gun even plugs in.
First, gather your foundation materials. You need a simple, inexpensive flat mirror with a wide frame. A flat wooden frame works best because it gives the glue maximum surface area to grip.
You also need industrial-strength adhesive. Hot glue works for quick placement, but heavy-duty construction adhesive ensures your heavy wood pieces actually stay on the wall instead of crashing down at 3 AM.
Here is your required material breakdown 🛠️:
- Pre-cleaned driftwood pieces
- Flat-framed wall mirror
- Construction adhesive and hot glue
- Heavy-duty D-ring wall hangers

Prepping and Cleaning the Wood
FYI, if you foraged your wood, you absolutely must prep it correctly. Soak your pieces in a mixture of water and a splash of bleach for a few days to kill off bacteria and unwanted pests. After the soak, leave them outside to bake in the hot sun until they dry completely. This crucial step prevents your beautiful new mirror from smelling like low tide during the summer months. Even store-bought wood benefits from a quick wipe-down with a damp cloth to remove excess dust. Clean wood ensures your adhesive forms an unbreakable bond. Nobody wants a crumbly disaster on their hands!

Choosing the Right Mirror Base
The mirror base determines the entire scale and impact of your project. I highly recommend picking a simple, flat-edged craft mirror or upcycling an old, tired framed mirror from a thrift store.
Round mirrors create a stunning, sunburst-like effect that feels very bohemian and free-flowing. Rectangular mirrors, on the other hand, offer a structured, classic windowpane vibe.
Ensure your frame surface feels rough enough to hold glue. Lightly sand the edges if they feel too slick or glossy. A proper foundation sets you up for absolute success. Want to see how a textured piece like this fits into a broader room design? Check out these 15 coastal blue sunroom ideas for summer vibes.

The Layout Phase: Playing Tetris
Stop right there! Do not apply a single drop of glue until you map out your design. Think of this phase as a highly satisfying game of natural Tetris. You want to arrange the wood pieces around the mirror to find the perfect balance of length, thickness, and texture.
I usually start by placing the longest, most dramatic pieces at the cardinal points (top, bottom, left, and right) to establish the overall diameter. Then, I layer smaller, chunkier pieces in between to build depth and hide the frame completely. Take a photo of your favorite layout before you start gluing so you remember exactly where everything goes!

Gluing It Down Like a Pro
Now comes the fun part, though it demands a little patience and a lot of ventilation. You need a two-glue strategy for the best results.
Apply a generous dab of heavy-duty construction adhesive for permanent strength, followed immediately by a squirt of hot glue next to it. The hot glue holds the piece instantly while the construction adhesive cures over the next 24 hours.
Press each piece firmly onto the frame and hold it for about ten seconds. Work your way around the mirror in small sections to prevent the glue from drying before you place the wood.
Always double-check your mirror glass to ensure no stray glue globs ruin the reflective surface. Keep some rubbing alcohol handy for quick smudge cleanups!

Filling the Gaps for a Seamless Look
After you secure the main pieces, you will inevitably spot some annoying gaps showing the bare frame underneath. Don’t panic! Grab your smallest, thinnest driftwood twigs and meticulously tuck them into those empty spaces. IMO, layering these tiny pieces creates an incredibly rich, 3D texture that makes the mirror look professionally crafted rather than quickly slapped together. I love using small pebbles or bits of sea glass to fill stubborn little holes, adding an unexpected pop of color. This detailed layering process transforms your basic DIY project into a true artisan showpiece.

Sealing and Protecting Your Masterpiece
You might feel tempted to hang it up immediately, but you must seal the wood to preserve its beauty. Unsealed wood collects dust like a magnet and degrades over time, especially in humid environments like bathrooms.
Spray the entire driftwood border with a clear, matte polyurethane sealant. The matte finish maintains that raw, beach-washed look without adding a fake, glossy plastic shine. Give it at least two light coats, letting it dry completely between applications. This simple step locks everything in place and ensures your gorgeous textured mirror lasts for years.

Hanging Your New Coastal Centerpiece
Wood and glass combined create a shockingly heavy decor piece. Do not trust a flimsy nail or a standard picture wire for this job! You need serious hardware.
Install heavy-duty D-rings directly into the sturdy back frame of the mirror, and use heavy wall anchors in your drywall. I once witnessed a poorly hung mirror rip straight out of a wall, and trust me, you want to avoid that heart-stopping crash.
Once securely mounted, step back and admire your handiwork. It catches the light beautifully and anchors the entire room. If you plan to feature this piece above a vanity, you might also want to choose nautical lighting for a coastal bathroom.

Conclusion
You just built a stunning piece of custom coastal decor with your own two hands! This DIY driftwood mirror brings natural texture, warmth, and a wonderful beachy aesthetic directly into your space. Plus, you get the bragging rights every time a guest compliments it. Which room are you hanging yours in? Let me know in the comments!