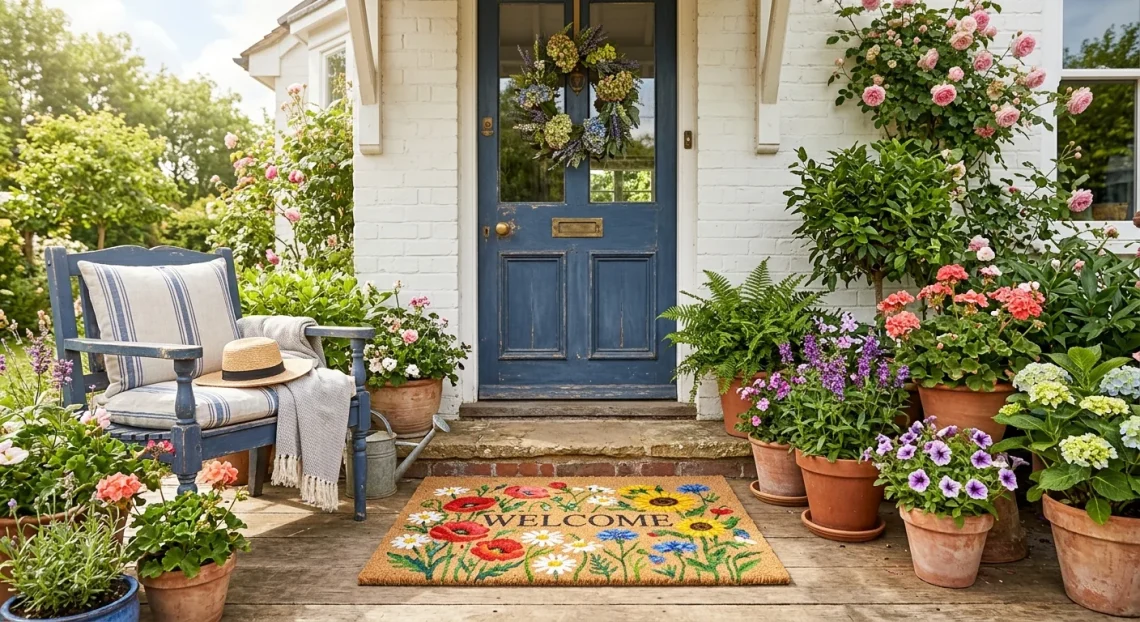
Let’s skip the boring, mass-produced doormats this summer. You know the ones I mean—those generic mats that fade away after barely two weeks. Instead, grab some paint and inject your own personality right at your front door! Painting a custom doormat takes barely an afternoon, and I promise it completely transforms your entryway vibe. Ready to get crafty?
Why Paint Your Own Doormat?
Ever wonder why your entryway feels a little lackluster, even after you add expensive planters? Sometimes the smallest handmade details make the absolute biggest impact. Custom doormats let you set the exact mood you want before guests even ring the doorbell. I actually painted a quirky geometric mat last June, and my neighbors asked where I bought it for weeks!
Plus, making your own saves you serious cash. High-end boutique mats cost a small fortune, but you can achieve that same premium look for a fraction of the price. If you want to tie your whole exterior together nicely, check out our guide to styling a cozy boho front porch.

Choosing the Right Base Mat
You need a plain coir doormat as your blank canvas. Coir consists of natural coconut fibers, giving it that rugged, scrubby texture perfect for wiping muddy shoes. Skip the synthetic mats entirely; paint simply slides right off them! Look for a heavy-duty, densely packed coir mat without a rubber border if you want a modern, edge-to-edge painted design. I highly recommend grabbing a standard 18×30 inch size, as it fits most single doors perfectly and gives you plenty of room to map out your vibrant summer motif.

The Ultimate Paint Breakdown
So, what paint actually sticks to tough coconut fibers? You cannot just slap leftover interior wall paint on a mat and hope for the best.
Outdoor acrylic paint provides the ultimate durability and vibrant color. It sinks deep into the bristly texture, dries quickly, and holds up wonderfully against the elements.
Liquid rubber spray paint works wonders for stencils, too. It creates a crisp, raised edge that resists heavy foot traffic far better than standard craft paint.
Honestly, just avoid watercolors or basic tempera at all costs IMO. You want something robust that laughs in the face of summer thunderstorms!

Essential Supplies You Will Need
Before we dive into the fun part, gather your tools. Having everything within arm’s reach prevents mid-project panics when your paint starts drying too fast. You probably have half of these items sitting in your garage right now, but a quick trip to the craft store handles the rest. Essential Materials:
- Plain blank coir doormat
- Outdoor acrylic paints or spray paint
- Stiff bristle stencil brushes (soft brushes fail against rough coir)
- Painter’s tape and heavy cardstock for stencils
- Clear UV-resistant outdoor sealant spray

Prepping Your Coir Canvas
Preparation dictates the success of this entire project. Coir mats shed like crazy straight out of the packaging. Give your mat a vigorous shake outside to remove all those loose fibers and dusty debris.
Next, grab a lint roller or some packing tape and run it over the surface. Removing these loose bristles ensures your paint sticks to the mat itself, not just the shedding fuzz.
If you plan to use a stencil, secure it tightly with sewing pins rather than tape. Tape struggles to grip the coarse coconut fibers, and pins hold your design perfectly flat against the unruly texture.

Mastering the Stencil Technique
Stenciling guarantees sharp, professional-looking letters and shapes. Once you pin your stencil down securely, apply your paint using an up-and-down dabbing motion. Brushing side-to-side pushes paint right under the stencil edges, immediately ruining your crisp lines.
I learned this the hard way after blurring a beautiful cursive “Hello” into an illegible blob. Use a stiff brush, load it with a modest amount of paint, and blot the excess on a paper towel before hitting the mat. Patience easily wins this race! 😉

Freehanding Like a Pro
Feeling a bit adventurous? Freehanding geometric shapes or abstract summer fruits gives your mat a playful, uniquely organic charm.
I love sketching my design lightly with a piece of white chalk first. The chalk rubs away easily if you make a mistake, giving you a completely risk-free rehearsal before the paint touches the mat.
When you start painting, push the brush firmly into the fibers. Coir drinks up a lot of paint, so you definitely need to apply two or three coats for opaque, vibrant colors.
Take frequent breaks and step back to view your progress. Standing over it too closely distorts your perspective!

Sealing the Deal for Summer Showers
Do not skip the sealant! You just spent a delightful afternoon creating a masterpiece; you must protect it from the harsh elements. Grab a can of clear, UV-resistant outdoor polyurethane spray. Wait for your paint to cure completely—usually about 24 hours—then coat the entire mat in a well-ventilated area. Give it at least two heavy coats to lock in the colors and prevent immediate sun fading. This simple step literally doubles the lifespan of your artwork. For more colorful outdoor inspiration, explore this dusty rose terracotta porch desert vibe.

Maintaining Your Masterpiece
Even with heavy-duty sealant applied, painted doormats eventually show wear. Dirt, mud, and grime act exactly like sandpaper under your guests’ shoes.
To keep it looking fresh, simply shake it out weekly instead of scrubbing it or vacuuming it aggressively. FYI, water destroys coir over time, so keep your newly painted mat under a covered porch or awning if possible.
If the colors start looking a bit dull by late August, just grab your leftover paint and do a quick touch-up. It takes five minutes and instantly revives your entryway’s bright summer spirit!

Conclusion
Painting a custom doormat offers the perfect weekend creative outlet that practically guarantees a smile every time you walk through your front door. You control the colors, the design, and the overall vibe of your entryway perfectly. Plus, your friends will definitely beg you to make them one! Which vibrant summer motif are you painting first—bold citrus slices or a classic, welcoming greeting? Let me know in the comments!