Skip to content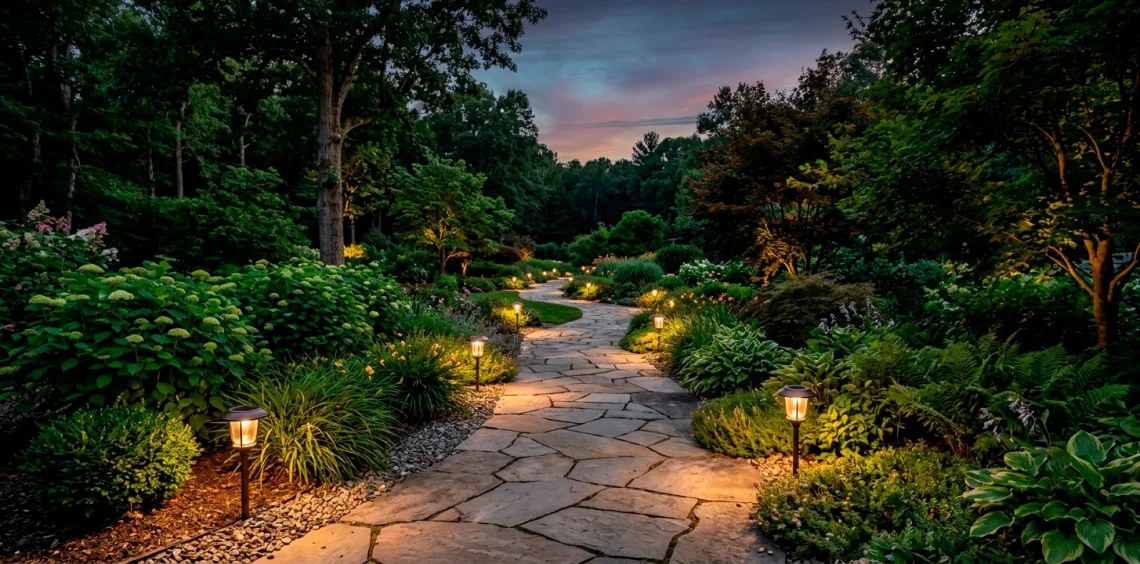
Let’s be honest, stumbling through your pitch-black yard at midnight is a complete recipe for disaster. I finally got tired of tripping over my own garden hoses and decided to upgrade my walkway. Installing solar-powered path lights is ridiculously easy, eco-friendly, and instantly boosts your curb appeal. Ready to give your outdoor space a brilliant glow-up? Let me show you exactly how I did it.
Planning Your Glowing Pathway
Before you buy anything, you absolutely need a solid plan. Grab a notebook and sketch your walkway. It sounds extra, but it literally saves you from buying way too many fixtures. I usually measure the total length of the path and figure out exactly where the darkest spots are. Do you really want your front yard looking like an obnoxious airport runway? Probably not. You want a subtle, inviting glow that guides your guests safely to the front door without blinding them. Just mark the spots where you want each light to sit and count them up. Easy, right?

Picking the Perfect Fixtures
Now for the fun part: shopping for your new gear. IMO, you should look for lights with glass housings instead of cheap plastic. Glass stays crystal clear over the years, whereas plastic gets cloudy and gross after just one harsh summer season. You also want a decent battery capacity. I highly recommend checking the lumens rating before hitting that checkout button. A rating between 10 and 20 lumens gives you that perfect, warm ambiance. Trust me, nobody wants a glaring stadium spotlight in their eyes while carrying groceries into the house. Keep it classy! 😎
A useful little gift for your home
🎁 Free Plant Finder Tool
Filter 250+ houseplants by style, size, and care level to find your perfect green companion in seconds.
We’ll email you the link. Plus, you’ll join our newsletter for fresh home inspiration.

The Pre-Charge Ritual
Here is a massive secret most people skip: the pre-charge. You absolutely must charge the batteries fully before sticking them in the dirt. Just unbox your shiny new fixtures, turn the power switches to the ‘on’ position, and let them bake in direct sunlight for at least 48 hours. I know, patience is hard when you want instant gratification. But this simple step extends the battery life significantly. Why shorten the lifespan of your new gear just because you rushed the process? Let them soak up those bright rays first so they perform perfectly on day one.

Prepping the Ground
You cannot just jam the stakes into dry, hard earth. You will snap the plastic spikes instantly, and then you will be super annoyed. I learned this the hard way after breaking two stakes in five minutes flat. 😅 Grab a watering can and thoroughly soak the soil along your pathway a few hours before the actual installation. If the ground still feels stubborn, use a long screwdriver to poke a quick pilot hole. It makes sliding the stake into the ground smooth as butter. You save your equipment and your sanity with this one simple trick.

Getting the Spacing Right
FYI, spacing is exactly where most folks mess up their designs. If you bunch the lights too close together, your yard looks weirdly cluttered and overwhelmed. If you space them too far apart, you leave dangerous dark gaps where someone could easily trip. Aim for about six to eight feet between each fixture. This distance creates beautiful, overlapping pools of soft light. Staggering them on opposite sides of the pathway also adds a really nice dynamic look that draws the eye forward. It feels incredibly professional, yet it takes zero extra effort.

The Installation Process
Time to actually put these bad boys in the ground. Gently push each stake into your pre-softened soil using both hands. Never press down on the top of the solar panel! You will crack the fragile glass or damage the internal wiring. Instead, grip the thickest part of the stem and push straight down until the fixture sits flush and completely level. Give it a tiny wiggle to make sure it feels totally secure in the earth. If it wobbles even a little bit, just pack some extra dirt around the base to lock it into place. You want these standing tall.

Avoiding Rookie Mistakes
We definitely need to talk about shade and placement. You might find the absolute perfect aesthetic spot for a light, but if a giant oak tree blocks the sun all day, that light simply won’t work at night. Observe how the sun hits your yard during the afternoon to ensure nothing obstructs the panels. Also, watch out for sneaky hazards! Here are my top placement tips to save you future headaches:
- Avoid deep shade cast by large evergreen trees.
- Keep them safely away from active sprinkler heads.
- Steer clear of high-traffic pet zones so they don’t get trampled.

Maintenance for Maximum Glow
Maintenance is practically nonexistent, but you still have to do a little light upkeep to keep things glowing. Wipe the top solar panels with a clean damp cloth every couple of months. Dirt, thick pollen, and bird droppings block the sunlight and ruin the charging efficiency. I usually just give them a quick swipe when I am already outside watering the front porch plants. Also, remember to trim any overgrown bushes that start creeping over your lights. You want them soaking up maximum sunshine every single day to guarantee a strong, beautiful evening glow.

Weatherproofing Tips
Winter brings its own unique set of challenges for solar outdoor gear. If you live in a spot with heavy, continuous snowfall, you might want to pull the lights inside during the absolute coldest months. Freezing temperatures can completely kill the internal rechargeable batteries if you aren’t careful. I normally leave mine out until the first hard freeze hits, then pack them away in a dry garage box.

Enjoying the View
Once the sun finally sets, step back and admire your handiwork. There is something incredibly satisfying about watching those warm lights kick on automatically as the evening rolls in. You just upgraded your home’s exterior with zero wiring, no electrician, and very minimal effort. Grab a cold drink, sit back on your porch, and enjoy the cozy, upscale vibe you just created. Seriously, your pathway looks amazing now, and you did it all yourself. This little weekend project definitely pays off every single night.

A useful little gift for your home
🎁 Free Plant Finder Tool
Filter 250+ houseplants by style, size, and care level to find your perfect green companion in seconds.
We’ll email you the link. Plus, you’ll join our newsletter for fresh home inspiration.
Conclusion
That is really all it takes to transform your dark yard from a frustrating obstacle course into a welcoming oasis. You save money on your electricity bill and gain major neighborhood bragging rights in the process. I still catch myself staring out the living room window just to admire my handiwork. Which pathway are you lighting up first? Let me know in the comments below!