Skip to content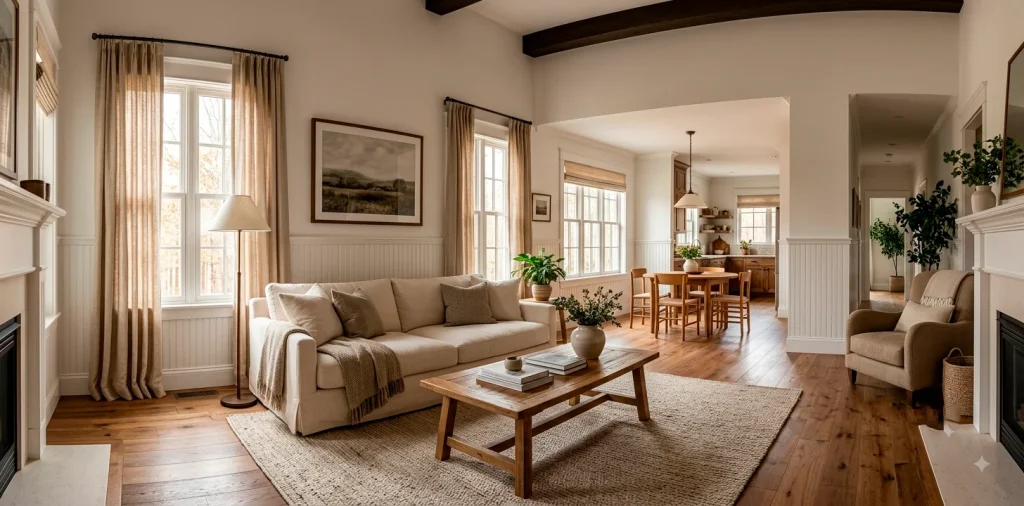
Want that cozy, lived-in cottage vibe without actually moving to the countryside? I feel you. Beaded board paneling is my absolute favorite cheat code for instant architectural texture. It completely transforms flat, lifeless drywall into a character-rich masterpiece. Grab your favorite mug of coffee, and let me show you exactly how to pull off this timeless look at home.
Why Beadboard is the Ultimate Cottage Hack
Ever wondered why some rooms just feel naturally inviting? It all comes down to texture and depth. Flat walls simply do not hug you the way textured walls do. Beadboard changes the entire architectural landscape of a space almost instantly.
This paneling effortlessly mimics traditional craftsmanship. You get that gorgeous vertical rhythm that draws the eye upward, making standard ceilings feel incredibly high. Plus, it hides minor drywall imperfections like an absolute champion. IMO, it completely beats spending days trying to fix messy walls. If you love classic charm, this is your holy grail. For more inspiration on formal spaces, check out this guide on elegant wainscoting wall molding dining room setups.

Choosing the Right Material for Your Space
Not all paneling is created equal. You generally choose between solid wood boards and MDF sheets. Solid wood offers that authentic, slightly imperfect rustic charm I absolutely adore, but it certainly costs a pretty penny. MDF, on the other hand, saves you serious cash and guarantees zero warping in humid environments. FYI, if you plan to install this in a bathroom or a damp basement, moisture-resistant MDF or PVC beadboard acts as your ultimate lifesaver. Never install raw wood in a splash zone unless you enjoy watching your hard work warp!
A useful little gift for your home
🎁 Free Plant Finder Tool
Filter 250+ houseplants by style, size, and care level to find your perfect green companion in seconds.
We’ll email you the link. Plus, you’ll join our newsletter for fresh home inspiration.

Prep Work Like a Pro
Preparation strictly dictates your final result. Don’t skip it!
First, remove your existing baseboards very carefully with a pry bar. You want a completely flush surface before you attach the new paneling.
Next, map out your wall studs. Using a trusty stud finder saves you from the nightmare of panels popping off a month later. Mark those studs clearly with a pencil so you know exactly where to shoot your nails.
Essential prep tools:
- Electronic stud finder
- Heavy-duty pry bar
- Construction adhesive
- Level and measuring tape
Trust me, I ruined two whole panels once because I miscalculated a corner!

Nailing the Installation Process
Once you prep the walls, the actual installation feels incredibly rewarding. Apply a generous zig-zag of construction adhesive to the back of your beadboard panel, press it firmly against the wall, and check it with your level. Always use a level on the very first piece! If your first board sits crooked, the entire wall inevitably looks like a funhouse mirror. Shoot your brad nails directly into the studs you marked earlier. I highly recommend using a pneumatic nail gun here; it makes the job move lightning-fast and saves your arm from intense fatigue.

The Magic of Paint and Finishing
Raw beadboard looks okay, but paint brings the magic.
Caulk every single seam and nail hole before you even touch a paintbrush. Wood filler works wonders for those tiny nail divots. Once everything dries perfectly smooth, sand it down gently. This tedious step separates the amateurs from the professionals.
Finally, choose your paint finish. Satin or semi-gloss finishes work beautifully because they reflect light, highlighting those charming vertical grooves. Flat paint completely kills the architectural texture you just worked so hard to create! I usually stick to soft creams, muted sage greens, or dusty blues for that authentic, relaxed cottage aesthetic.

Where to Actually Put This Stuff?
You can legitimately put beadboard almost anywhere. Seriously, the limit does not exist.
Wainscoting remains the most popular application. Installing panels on the lower third of a hallway or dining room wall protects your drywall from scuffs while adding insane character. But do not ignore your kitchen island! Wrapping an outdated builder-grade island in beadboard instantly upgrades the entire room. I transformed my boring kitchen island in a single weekend, and it still gets compliments from everyone who walks through the door.

Ceiling Treatments That Drop Jaws
Have you ever looked up and felt completely underwhelmed by a flat white ceiling? Installing beadboard on the ceiling completely revolutionizes a room. It draws the eye upward and adds a cozy, enveloping texture that standard drywall simply cannot achieve. This treatment looks especially stunning in sunrooms, porches, and cozy bedrooms. Honestly, staring at a textured cottage ceiling while lying in bed feels like waking up in a luxury bed-and-breakfast every single morning. Just make sure you recruit a friend to help hold those heavy panels overhead!

Bathroom Bliss with Beadboard Wainscoting
Bathrooms desperately need architectural interest.
Tile easily gets expensive and feels a bit cold. Beadboard warms up a stark bathroom beautifully.
Always use PVC or moisture-resistant MDF in wet spaces. I cannot stress this enough! Standard wood absorbs steam and expands, completely ruining your paint job. Cap your wainscoting with a thick, chunky chair rail for a polished look.
Fun styling elements:
- Vintage brass wall sconces
- Free-standing clawfoot tubs
- Dark floral shower curtains
This combination screams vintage cottage charm. If you love mixing woods in spaces like this, read this guide mixing wood tones like pro.

Mixing Textures Without Losing Your Mind
Paneling works best when you pair it with contrasting textures. If you cover every single surface in beadboard, your room quickly looks like a claustrophobic wooden box! Balance those clean vertical lines with organic elements. I love pairing crisp white wainscoting with heavily textured grasscloth wallpaper above it. The smooth, painted wood grounds the space, while the woven wallpaper adds incredible warmth. Throw in some soft linen curtains and a chunky wool rug, and you successfully master the cozy cottage aesthetic without overwhelming the senses.

Common Mistakes to Avoid
Nobody wants a botched DIY project.
Skipping the top trim is a cardinal sin. Raw beadboard edges look messy and unfinished. Always cap your paneling with a beautifully profiled chair rail or cap molding. It provides a clean transition between the paneling and the bare wall above.
Another huge mistake involves ignoring outlet extenders. When you add thick paneling over drywall, your electrical outlets sit too deep inside the wall. Buy cheap box extenders to bring your switches flush with the new wood surface. It keeps everything safe and looking incredibly professional! 🛠️

A useful little gift for your home
🎁 Free Plant Finder Tool
Filter 250+ houseplants by style, size, and care level to find your perfect green companion in seconds.
We’ll email you the link. Plus, you’ll join our newsletter for fresh home inspiration.
Conclusion
Adding beaded board paneling remains the absolute best way to inject architectural cottage texture into your home. It instantly elevates boring walls, hides ugly drywall, and brings unparalleled charm to any space. Grab your level, pick a gorgeous paint color, and transform your room this weekend. Which space are you tackling first? Let me know in the comments!