Your staircase sets the entire vibe of your entryway, yet we always ignore that chipped, dated railing. I lived with a sticky, orange-tinted 90s handrail for years before finally grabbing my sandpaper. Refinishing your banister instantly transforms a tired house into a sleek modern space without wrecking your budget. Let me show you how to tackle this weekend upgrade like a pro!
The honest assessment of your staircase
Take a really close look at your railing setup before buying a single drop of stain. Are you dealing with solid oak, cheap laminate, or decades of peeling white paint? You need to know your base material right now because natural wood reacts very differently than synthetic replacements when you start sanding.
Grab a flashlight and check for loose joints or wobbly spindles. Fixing structural wobbles comes before any cosmetic glow-up. Why spend hours sanding and staining if the whole structure shakes every time the dog runs downstairs? Grab some wood glue and tighten those loose screws first!

Choosing your winning modern aesthetic
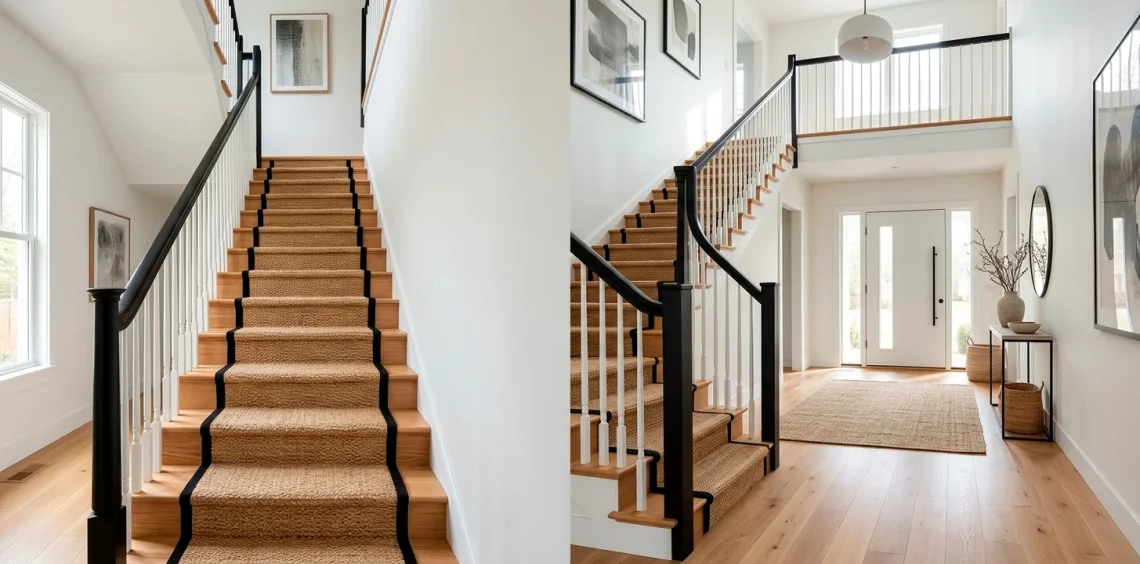
What specific style makes your heart sing when you scroll through decor blogs? The classic black handrail alongside crisp white spindles always screams modern farmhouse perfection, IMO. Prefer a sleek, Scandinavian vibe? Go for a light, natural wood tone and protect it with a clear satin sealer. You can even paint the entire structure a bold charcoal if you want serious drama in your foyer. Just match your updated banister to your existing interior door trim so the whole house flows effortlessly together!

Prep work and the reality of sanding
Let me be completely honest: sanding is a dusty, tedious workout. You must seal off the rest of your house with plastic drop cloths unless you love eating fine wood dust for dinner! 😭
Start with 80-grit sandpaper to bust through that stubborn old varnish, then progress smoothly up to 150-grit for a silky finish. A detail palm sander will save your wrists and sanity on the wide flat handrail sections.
For those tricky, curved vertical spindles, wrap flexible sandpaper strips around the wood and pull back and forth like you are shining shoes. It takes patience, but proper prep guarantees a flawless modern look!

To strip or not to strip?
Ever wondered if you really need heavy-duty chemical strippers for this project? If your banister hides under five stubborn layers of chipped oil paint, sanding alone will just ruin your sanity and eat through fifty sanding disks. Apply a thick layer of citrus-based gel stripper with a cheap brush, let it bubble up for an hour, and gently scrape the goop away with a plastic putty knife. It looks messy and smells a bit funky, but it reveals pristine bare wood underneath in a fraction of the time without damaging the delicate trim!

Fixing deep scratches and mysterious dents
What happens when you strip the paint away and discover nasty deep dog chews or mysterious dents in the wood? Don’t panic! You can easily fix these imperfections before you apply any new finish.
Grab a high-quality, stainable wood filler and press it firmly into the gouges using a flexible putty knife.
Allow the filler to cure completely before sanding it flush with the surrounding wood grain. Smooth, invisible repairs separate a professional job from a sloppy amateur DIY.
If you plan to paint rather than stain, standard spackle or acrylic wood putty works wonders and dries even faster.

Staining for deep, rich color
Always apply a pre-stain wood conditioner before coloring raw wood! Skip this simple preparatory step, and your banister will end up looking like a blotchy, uneven mess that you will immediately regret.
Stain application essentials:
- Use a clean, lint-free cotton rag to wipe stain evenly WITH the natural wood grain.
- Let the stain penetrate for five minutes before wiping away excess liquid.
- Apply a second coat after two hours if you want deeper color saturation.
I learned this lesson the hard way on my dining table years ago! Work in small three-foot sections so the stain never dries tacky on the surface.

Painting spindles without the drips
Painting thirty or forty individual vertical spindles sounds like a total nightmare, right? The secret lies in using a high-quality angled sash brush and leveling paint that self-smooths as it dries on the wood. Apply thin, light coats instead of trying to cover everything in one heavy pass. Two thin coats prevent nasty drips and unsightly brush marks from ruining your hard work. Keep a damp microfiber rag nearby to instantly wipe away any accidental paint smudges that land on your freshly stained handrail before they dry permanently!

Sealing your work for daily survival
Think about how many sweaty hands, wedding rings, and dog claws slide across your banister every single week. You must protect that gorgeous new color with at least three coats of clear water-based polyurethane.
Why water-based? These modern formulas dry crystal clear and never yellow over time like old-school oil finishes do. FYI, nobody wants an orange handrail returning after all that exhausting stripping work!
Lightly scuff the surface with 220-grit sandpaper between coats to remove dust nibs and achieve a baby-smooth, professional sheen that lasts for decades!

Swapping out dated brackets and hardware
Why keep rusty 1980s brass brackets when you just spent all weekend perfecting the wood? Unscrew those old wall mounts and dump them in the recycling bin immediately! Upgrading to sleek matte black, brushed nickel, or contemporary champagne bronze hardware instantly elevates the entire setup. This tiny $30 swap makes an unbelievable difference in your final reveal.
Just make sure you anchor your new brackets directly into wall studs so nobody rips the railing down during morning rush hour. If you want more easy hardware upgrades across your home, check out these 20 warm brass hardware updates for a winter refresh.

The satisfying final cleanup and reveal
Once the final topcoat dries completely, the real fun finally begins! Peel away that blue painter tape at a clean 45-degree angle to reveal your laser-sharp paint lines between the handrail and spindles.
Vacuum up every lingering speck of sanding dust from your stairs and wipe down the surrounding floors with a microfiber mop.
Take a moment to clean any residue off your nearby wall trim so everything looks brand new and crisp.
Step back and admire your stunning craftsmanship—you just saved thousands of dollars in contractor fees and leveled up your entire entryway! 🔥

Styling your newly refreshed staircase
Now that your banister looks like a million bucks, don’t let the surrounding walls look boring! Add a plush textured runner down the steps to introduce warmth and prevent slipping. Hang a series of framed family photos or minimalist prints along the ascending wall to draw the eye upward. A vibrant potted pothos trailing down from the landing completes that fresh, organic look. For some incredible wall inspiration, take a peek at these modern art displays for a sophisticated staircase.

Conclusion
Refinishing your banister takes a bit of elbow grease, sweat, and patience, but the stunning visual transformation is worth every single second of sanding. You now have the exact blueprint to turn that tired railing into a striking modern centerpiece you can brag about. Which aesthetic are you choosing for your staircase upgrade? Let me know in the comments!