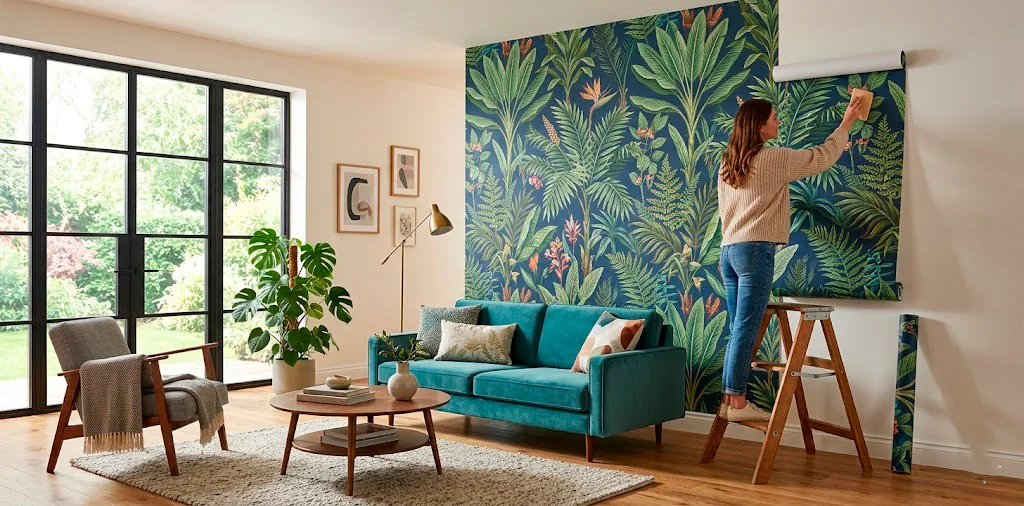
Let’s tackle that blank wall staring at you right now. 🤨 You want a stunning room makeover, but the mere thought of messy glue and scraping makes you break out in hives. I totally get it. Peel-and-stick options give you that high-end designer look without the lifelong commitment. Here is your ultimate playbook for picking the absolute best temporary wallpaper for your beautiful space.
Peel-and-Stick vs. Traditional Paste
Let’s clear the air immediately about the current market options. Traditional paste wallpaper requires the patience of a saint and a literal PhD in DIY geometry to get perfectly straight. Who actually has time for that chaos? 🙄 Peel-and-stick literally acts like a giant sticker for your room, bypassing the messy buckets entirely.
You just peel the protective backing, line up the intricate seams, and smooth it down over your wall. I tried pasting traditional paper once in my hallway, and let me tell you, it ended in tears and a ruined weekend. If you want a lightning-fast aesthetic refresh, temporary rolls provide your ultimate salvation.

Material Matters: Vinyl vs. Fabric
Not all sticky papers share the exact same chemical DNA, so you need to read the fine print. Vinyl heavily rules the roost for maximum durability because you can effortlessly wipe away mysterious smudges with a simple damp cloth. Fabric feels luxuriously matte and surprisingly soft to the touch, but it absolutely refuses to tolerate high moisture environments. Ever wonder why some prints look shockingly cheap under bright lights? They usually utilize thin, low-grade plastic that reflects every single harsh glare in your room. Always check the material specs before you hit that final checkout button, IMO.

Sizing Your Space Without Losing Your Mind
Math usually ruins my day, but you absolutely need accurate measurements to conquer this project successfully. Grab a sturdy steel tape measure and capture the exact width and height of your target wall surface.
Add two extra inches to every single side just to thoroughly cover your bases during installation. Walls rarely sit perfectly straight, especially in older apartment buildings!
Pro tip: Always order your entire project in one single batch. Different manufacturing runs often feature slightly mismatched color variations that ruin the vibe.
You seriously do not want half your living room rocking a moody cool navy while the other half subtly leans toward bright teal. Trust me on this one.

Bold Prints vs. Subtle Textures
Choosing a specific design often triggers sudden, overwhelming decision paralysis. Huge, dramatic florals make an incredibly bold statement in tiny powder rooms or grand entryways, while subtle grasscloth textures bring sophisticated, quiet warmth to expansive living spaces. I personally love utilizing a chaotic botanical print behind a simple bed frame as an instant, incredibly budget-friendly headboard solution. Think critically about your existing furniture and let the new wallpaper either aggressively steal the show or quietly support the room’s overarching aesthetic vibe.

Prep Work: The Boring But Crucial Step
I know you want to rip open that delivery box and start sticking panels immediately. Stop right there! 🛑 Temporary wallpaper aggressively demands a pristine, completely dust-free surface to grip the drywall properly.
Wipe down your entire target wall with a damp microfiber cloth and a tiny drop of gentle dish soap. If you skip this critical step, the strong adhesive grabs the invisible dust instead of your actual paint, and your gorgeous new print will tragically peel off by midnight.
Also, if you recently painted that specific wall, you absolutely must wait at least four solid weeks for the fresh paint to cure completely. Slapping heavy wallpaper over uncured paint guarantees a disastrous, bubbling mess later on.

Conquering the Dreaded Air Bubbles
We critically need to address the massive elephant in the room: annoying air bubbles. They definitely will happen during your installation, but they absolutely do not have to ruin your life or your design dreams. Buy a cheap plastic smoothing tool or simply grab an old credit card wrapped securely in a soft microfiber cloth.
Push the trapped bubbles gently outward toward the closest panel edge as you slowly pull the paper backing off inch by inch. If a stubborn, irritating pocket of air stubbornly refuses to move, carefully pierce the very center with a tiny sewing needle and press it completely flat. Boom, crisis instantly averted!

Can It Survive Bathrooms and Kitchens?
Everyone constantly asks me if temporary wallpaper actually survives in notoriously humid zones. The short, honest answer? Yes, but only if you meet some strict conditions.
You absolutely must choose a thick, highly moisture-resistant vinyl material for these high-traffic splash zones. Standard fabric options simply absorb ambient steam and peel significantly faster than you can say “DIY disaster.”
Kitchen splash zone requirements:
- Heavy-duty vinyl composition for easy wiping
- Heat-resistant adhesive near active stoves
- Smooth, scrubbable surface texture
Just keep the paper strictly away from direct, continuous water streams like the inside of your glass shower enclosure, obviously.

The Ultimate Renter-Friendly Magic
Landlords absolutely despise permanent structural modifications, making these sticky rolls the ultimate holy grail of modern apartment living. You can finally mask that hideous builder-grade beige without risking a single dime of your precious security deposit. It gives you the incredible power to inject your exact, vibrant personality into a completely temporary space, proving you definitely don’t need a huge mortgage to curate phenomenal interior style. By the way, if you genuinely love upgrading tight rentals without angering your landlord, you definitely need to check out our comprehensive renters guide to a temporary slat wall.

Removing It Later Without Tears
The magical day eventually arrives when you decide to move out or drastically change your room’s vibe. Do you just recklessly yank the paper off the wall? Absolutely not, unless you enjoy paying for expensive drywall repairs. Grab your trusty hairdryer and blast the paper seams steadily on a medium heat setting.
The targeted warmth gently softens the stubborn adhesive underneath, allowing the wide panels to pull away beautifully smoothly without taking nasty chunks of drywall with them. Take your time, pull downward at a sharp 45-degree angle, and marvel at the beautifully pristine paint left completely intact behind it.

The Real Cost Breakdown
Let’s talk honestly about the money. High-quality removable wallpaper definitely demands an upfront financial investment to achieve that premium look. Expect to pay anywhere from $30 to $100 per roll, depending on the material thickness and the artist’s royalty fees.
Cheap alternatives certainly exist, but they usually tear frustratingly easily during installation and completely ruin your decorating mood. Consider a premium roll a solid investment in your daily happiness.
If you only want a cool background behind your flatscreen, a single roll easily fits most budgets. For more ideas on outfitting tiny living spots, fully explore these vertical tv wall ideas for small spaces.

Wrapping Up Your Wallpaper Journey
Transforming your space absolutely does not require permanent commitments or messy construction zones anymore. You possess all the crucial knowledge needed to measure, prep, and stick your way to a gorgeously refreshed room. Grab your favorite bold print and radically change your walls this weekend! Which wild pattern are you grabbing first? Let me know in the comments below!