Staring at those outdated, honey-oak cabinets in your rental kitchen and plotting their demise? I totally get it. Renting shouldn’t mean sacrificing style, but tackling a kitchen makeover feels scary when a security deposit is on the line. Let me walk you through the absolute best way to paint those cabinets safely, smartly, and stylishly.
Why Bother Painting Renter Cabinets?
Ever wondered why a simple color change completely transforms a room? Kitchens are the heart of our homes, and dark, dated cabinets suck the life right out of them. A fresh coat of paint brightens the space and actually makes cooking enjoyable again.
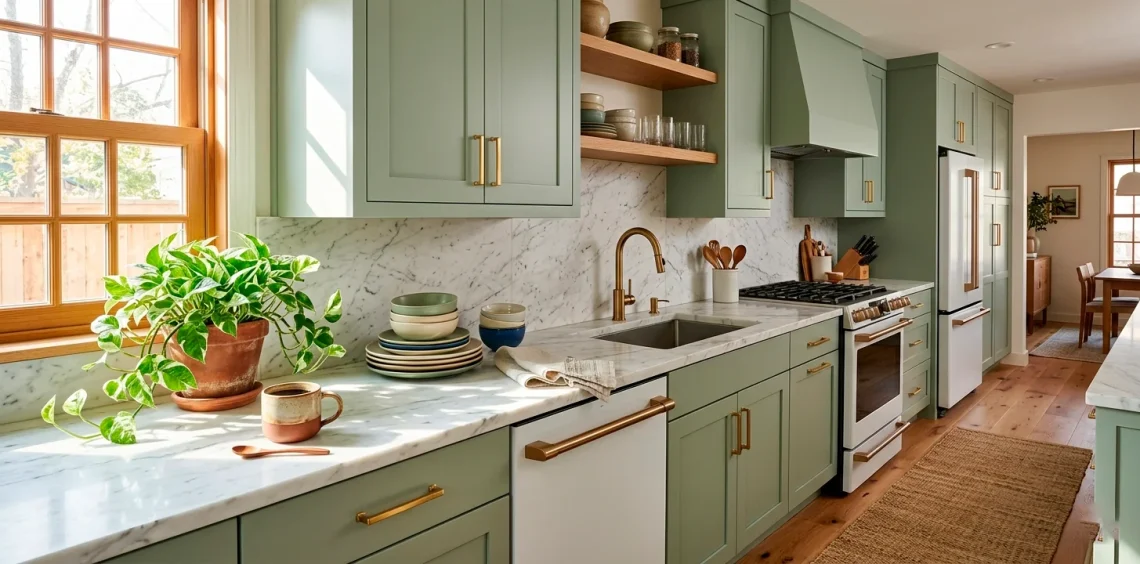
I remember living in a tiny apartment with the grossest brown laminate cupboards. Painting them soft sage green changed my entire morning vibe! You deserve a kitchen that feels like yours, even if you only rent it. Plus, it is a shockingly cheap weekend project.

The Golden Rule: Ask Your Landlord First
Let me stop you right there before you grab a brush. You absolutely must get written permission from your landlord. I know, I know, asking for forgiveness is usually easier than asking for permission, but kissing your security deposit goodbye is a tough pill to swallow. Draft a polite email detailing your plan, the exact colors you want to use, and maybe even offer to leave the upgraded cabinets for the next tenant. Nine times out of ten, they gladly say yes to free property upgrades!

Picking the Right Paint (That Won’t Peel)
Do not just slap on any leftover wall paint you find in the garage. Cabinets endure heat, grease, and constant touching, so you need a specialized formula.
Water-based alkyd paints are the holy grail for this project. They give you the durable, hard finish of an oil-based paint but clean up easily with water and soap.
IMO, skipping the cheap stuff saves you endless headaches down the road. If you buy terrible paint, it just chips off the second you bump it with a frying pan.
Wondering what finishes work best? Satin or semi-gloss finishes reflect light beautifully and wipe down like a dream. Matte looks incredibly chic on Pinterest, but it holds onto greasy fingerprints like a magnet.

Prep Work Is Your Best Friend (And Worst Enemy)
I hate to break it to you, but eighty percent of a flawless cabinet paint job is pure, unadulterated prep work. If you skip cleaning, your paint will practically slide right off the grease spots.
Grab a heavy-duty degreaser and scrub every single inch of those doors and frames. Pay special attention to the areas around the stove and the handles, because that is where the invisible grime lives.
Next, grab some painter’s tape and protect your walls, countertops, and appliances. Taking an extra hour to tape everything off perfectly saves you three hours of scraping rogue paint splatters later.

Tools of the Trade You Actually Need
Using the right tools completely changes the game. You do not need a fancy paint sprayer, but you absolutely need high-quality applicators to avoid those dreadful brush strokes.
Must-have painting tools:
- High-density foam rollers (for smooth surfaces)
- An angled synthetic brush (for grooves and corners)
- Fine-grit sandpaper
- Tack cloths (to remove dust)
Investing in a good brush makes the finish look professional. If your kitchen is incredibly tight and lacks surface space, you might also want to check out some clever maximizing small kitchens fold down tables.

To Sand or Not to Sand?
To sand or not to sand? That is the ultimate DIY question. Even if your primer says ‘no sanding required’, a light scuff-sand creates a micro-texture that helps the primer grip the surface like superglue. You do not need to strip the wood bare! Just take a 120-grit sanding block and gently rub it over the doors until the glossy finish looks dull. Wipe away all the dust with a tack cloth, and you are golden.

Priming Like a Pro
Never, ever skip the primer. I cannot stress this enough! Primer blocks stains, stops wood tannins from bleeding through your beautiful new color, and provides the ultimate base for your topcoat.
Shellac-based or bonding primers work absolute miracles on glossy or laminate renter cabinets. They stick to practically anything, meaning your paint job survives daily wear and tear.
Apply a thin, even coat of primer using your foam roller. Let it dry completely according to the can’s instructions, then give it a super gentle sand with 220-grit paper before applying your actual paint.

The Painting Process (Without Losing Your Mind)
Now comes the fun part! Start by cutting in the edges and recessed panels with your angled brush, then immediately roll over the flat areas with your foam roller to smooth out the brush strokes.
Patience is key here. Two thin coats always look infinitely better than one thick, drippy coat. Let the first coat dry thoroughly. Put on a good podcast, grab a snack, and resist the urge to rush the second coat. Once the final coat dries, your kitchen feels brand new!

Hardware Upgrades for Instant Glam
Want to know a secret? New hardware acts like jewelry for your cabinets. Even the most perfect paint job falls flat if you put those tarnished, 90s-era knobs back on.
Swapping hardware is completely renter-friendly. Just unscrew the old knobs, bag them up safely in a closet, and install your shiny new pulls.
Matte black or brushed brass handles instantly modernize any kitchen. FYI, ensure you buy hardware that matches the existing hole spacing so you do not have to drill new holes.
This small detail truly elevates the whole room and gives it that expensive, custom feel without blowing your budget. If you are aiming for a serene, uncluttered look with your new hardware, you might appreciate these ideas for minimalist magic scandinavian kitchen clean calm.

Moving Out? Reversing the Damage
What happens when you move out? If you got written permission from your landlord, you just leave your gorgeous cabinets exactly as they are! The landlord gets a free kitchen upgrade, and you get your full deposit back. If you only swapped the hardware, simply unscrew your custom knobs and screw the old ones back in. It takes ten minutes, and you get to take your beautiful hardware to your next apartment.

Conclusion
Painting your rental cabinets transforms a drab space into your personal sanctuary. Yes, it takes a little elbow grease and a weekend of your time, but that fresh, custom look is entirely worth the effort. Grab your primer, turn up your favorite playlist, and completely reinvent your kitchen! Which color are you grabbing first? Let me know in the comments!